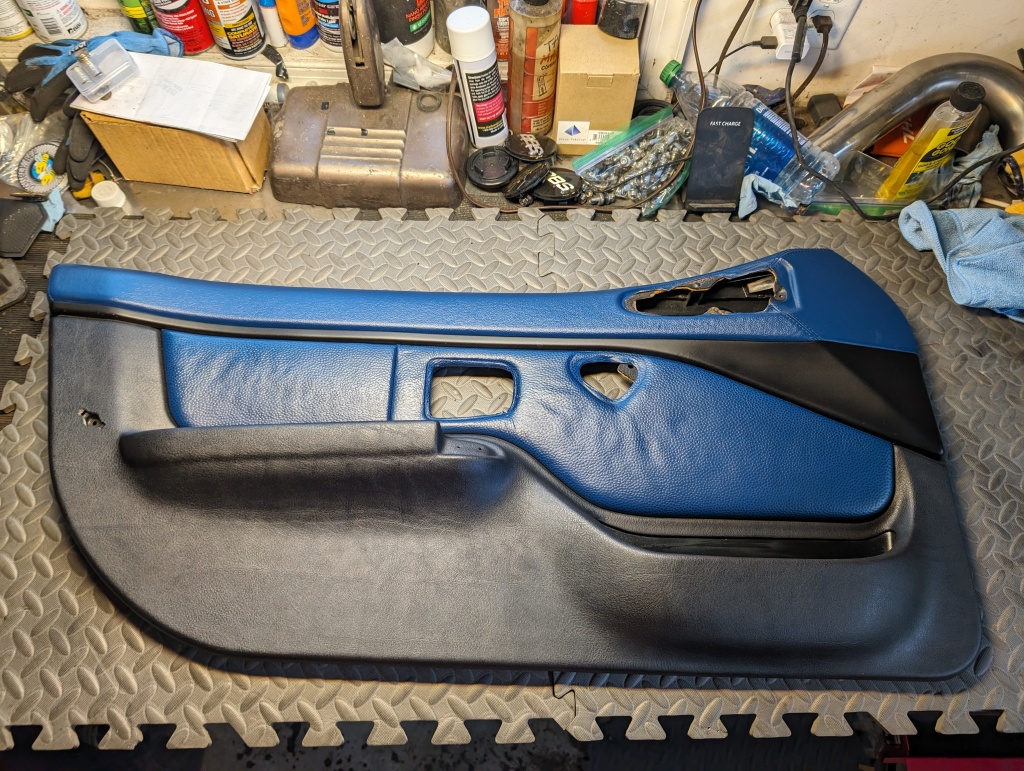
Z3 door card refurbishment complete DIY
From a full airbag retrofit of pre-airbag panels to the simple replacement of the door pull that is worn out, the following DIY should have you covered for your door card/panel refurbishment needs. It will be laid out as the most complex of operation (full airbag retrofit panel into a non-airbag card) but can be used piece meal as needed for any less complex repairs as it all is covered below.
I’ve done a few door card repairs/retrofits by now ranging from a simple insert replacement due to damage around the door release to a complete retrofit of a NOS pre-airbag extended leather card to airbag fitted card.
Tooling:
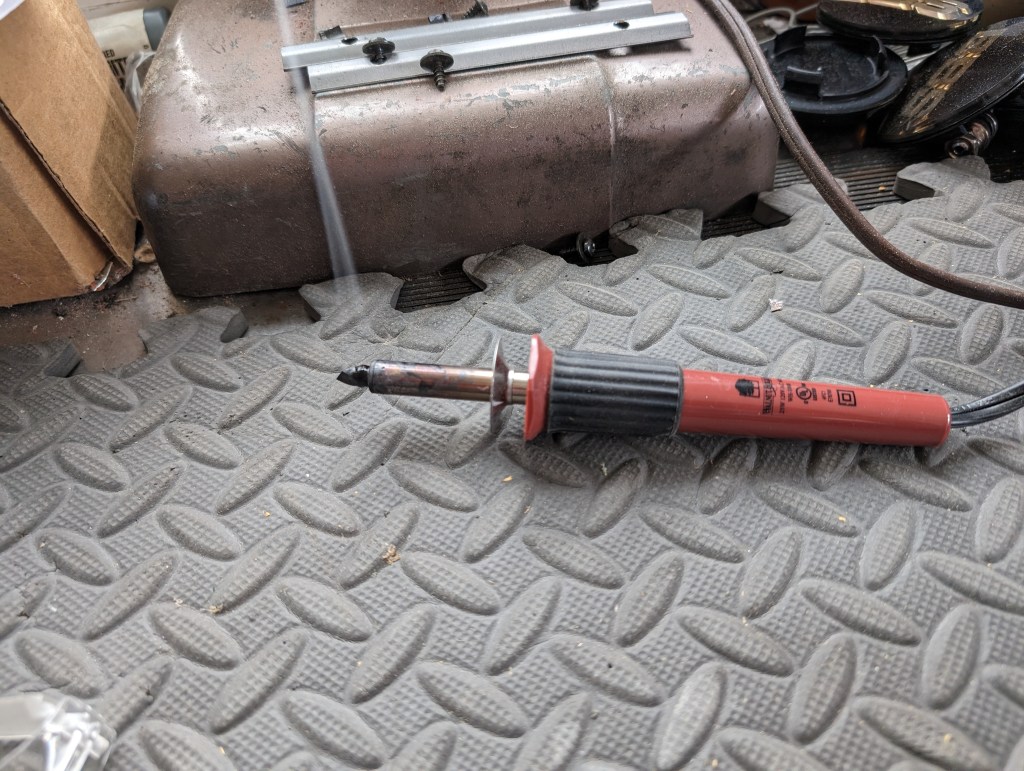
- Wood burning iron (insert & hockey stick R&R)
- Phillips screw driver
- Wire brushes (speaker pod refurbishment)
- T-10 torx driver/bit (speaker from pod removal)
- M7 tap (door pull broken stud fix)
- 15/64” or 6mm drill bit for M7 tap (door pull broken stud fix)
- Light Duty Staple Gun (insert replacement)
- 80 grit sand paper (airbag retrofit & panel clip reattachment)
- Long throated vice grips (2 ea) (airbag retrofit & door pocket reattachment)
- Various clamps (reattachment of glued components/mounts)
- Dremel with 561 bit (airbag retrofit)
- Finger sander (airbag retrofit)
- 180 grit finger belt (airbag retrofit)
- Acid brush (Vinyl repair over speaker pods)
- Seam roller
- Respirator
- Respirator cartridges
Materials:
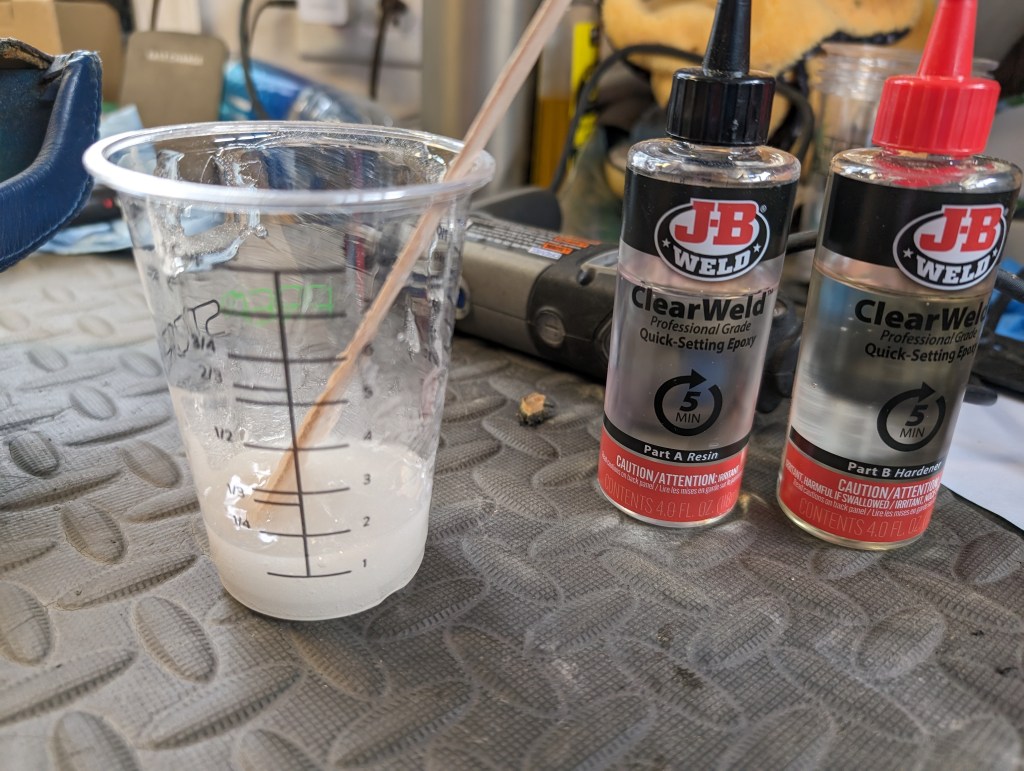
- Epoxy (airbag retrofit & panel clip reattachment)
- Epoxy mixing cups (8oz) (airbag retrofit & panel clip reattachment)
- Epoxy stir (airbag retrofit & panel clip reattachment)
- Black spray paint (speaker pod refurbishment)
- Acoustic fabric (speaker pod refurbishment)
- M7 stud, washer, & nut (door pull broken stud fix)
- 3M Fabric Adhesive (insert replacement)
- ¼” Light duty staples (insert replacement)
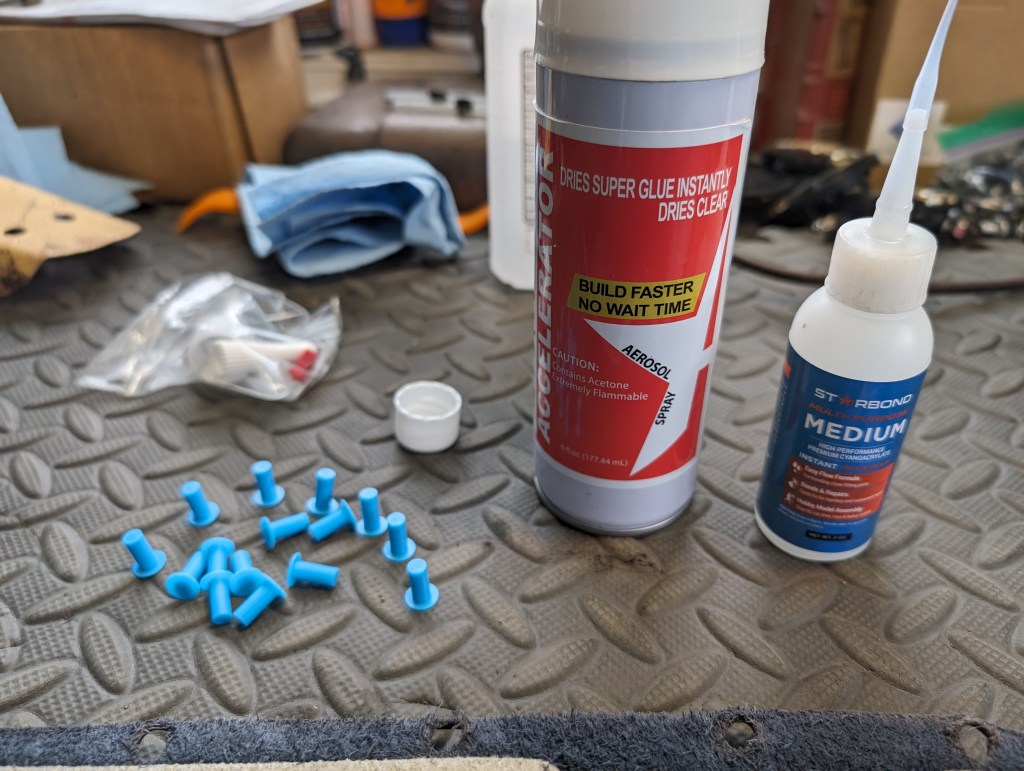
- Starbond glue (leather insert repairs)
- Starbond accelerator (leather insert repairs)
OEM [Black] PN’s reference from recent work but NOT inclusive:
- Door trim left (hockey stick) 51418398737
- Door trim right (hockey stick) (NLA) 51418398738
- Door pocket left None known
- Door pocket right None known
- Window trim left None known
- Window trim right None known
- Door trim triangle left 51418407767
- Door trim triangle right (NLA) 51418407768
- Airbag clip panel left None known
- Airbag clip panel right None known
- Airbag frame left None known
- Airbag frame right None known
- leather door pull Left (NLA) 51418401173
- leather door pull Right (NLA) 51418401174
- speaker grille assembly left 51418397539
- speaker grille assembly right 51418397540
- Panel clip 51411973500
- Small panel clip mount None known
- Airbag tab left 51418413215
- Airbag tab right 51418413216


Disassembly:
After removal of the door panel from the car (and likely ripping off a few panel clip mounts from the door card) disassembly can begin:
- Remove single phillips screw from speaker grill and slide the grille FWD and out of the door card.
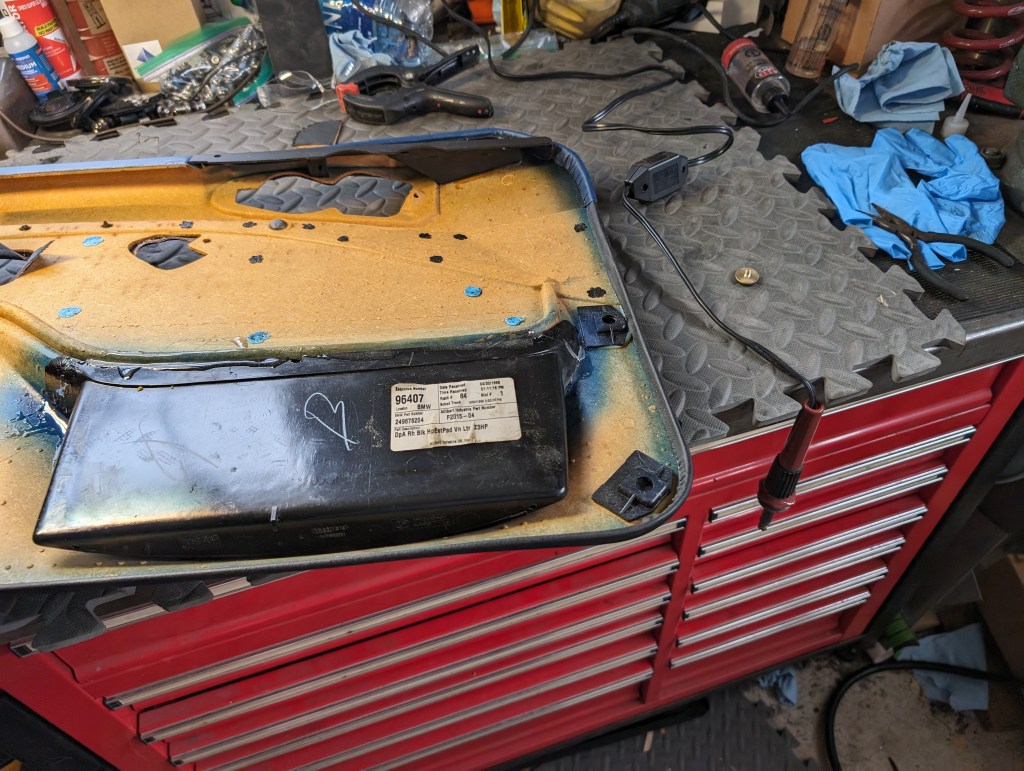
- The door pull is held to the door card by a melted stud at the top end and a pair of phillips screws at the bottom. If the melt stud is still intact, use the wood iron to melt the flared stud back towards the center of the stud enough to remove through the door card. Remove the two phillips screws to disassemble the pull from the door card
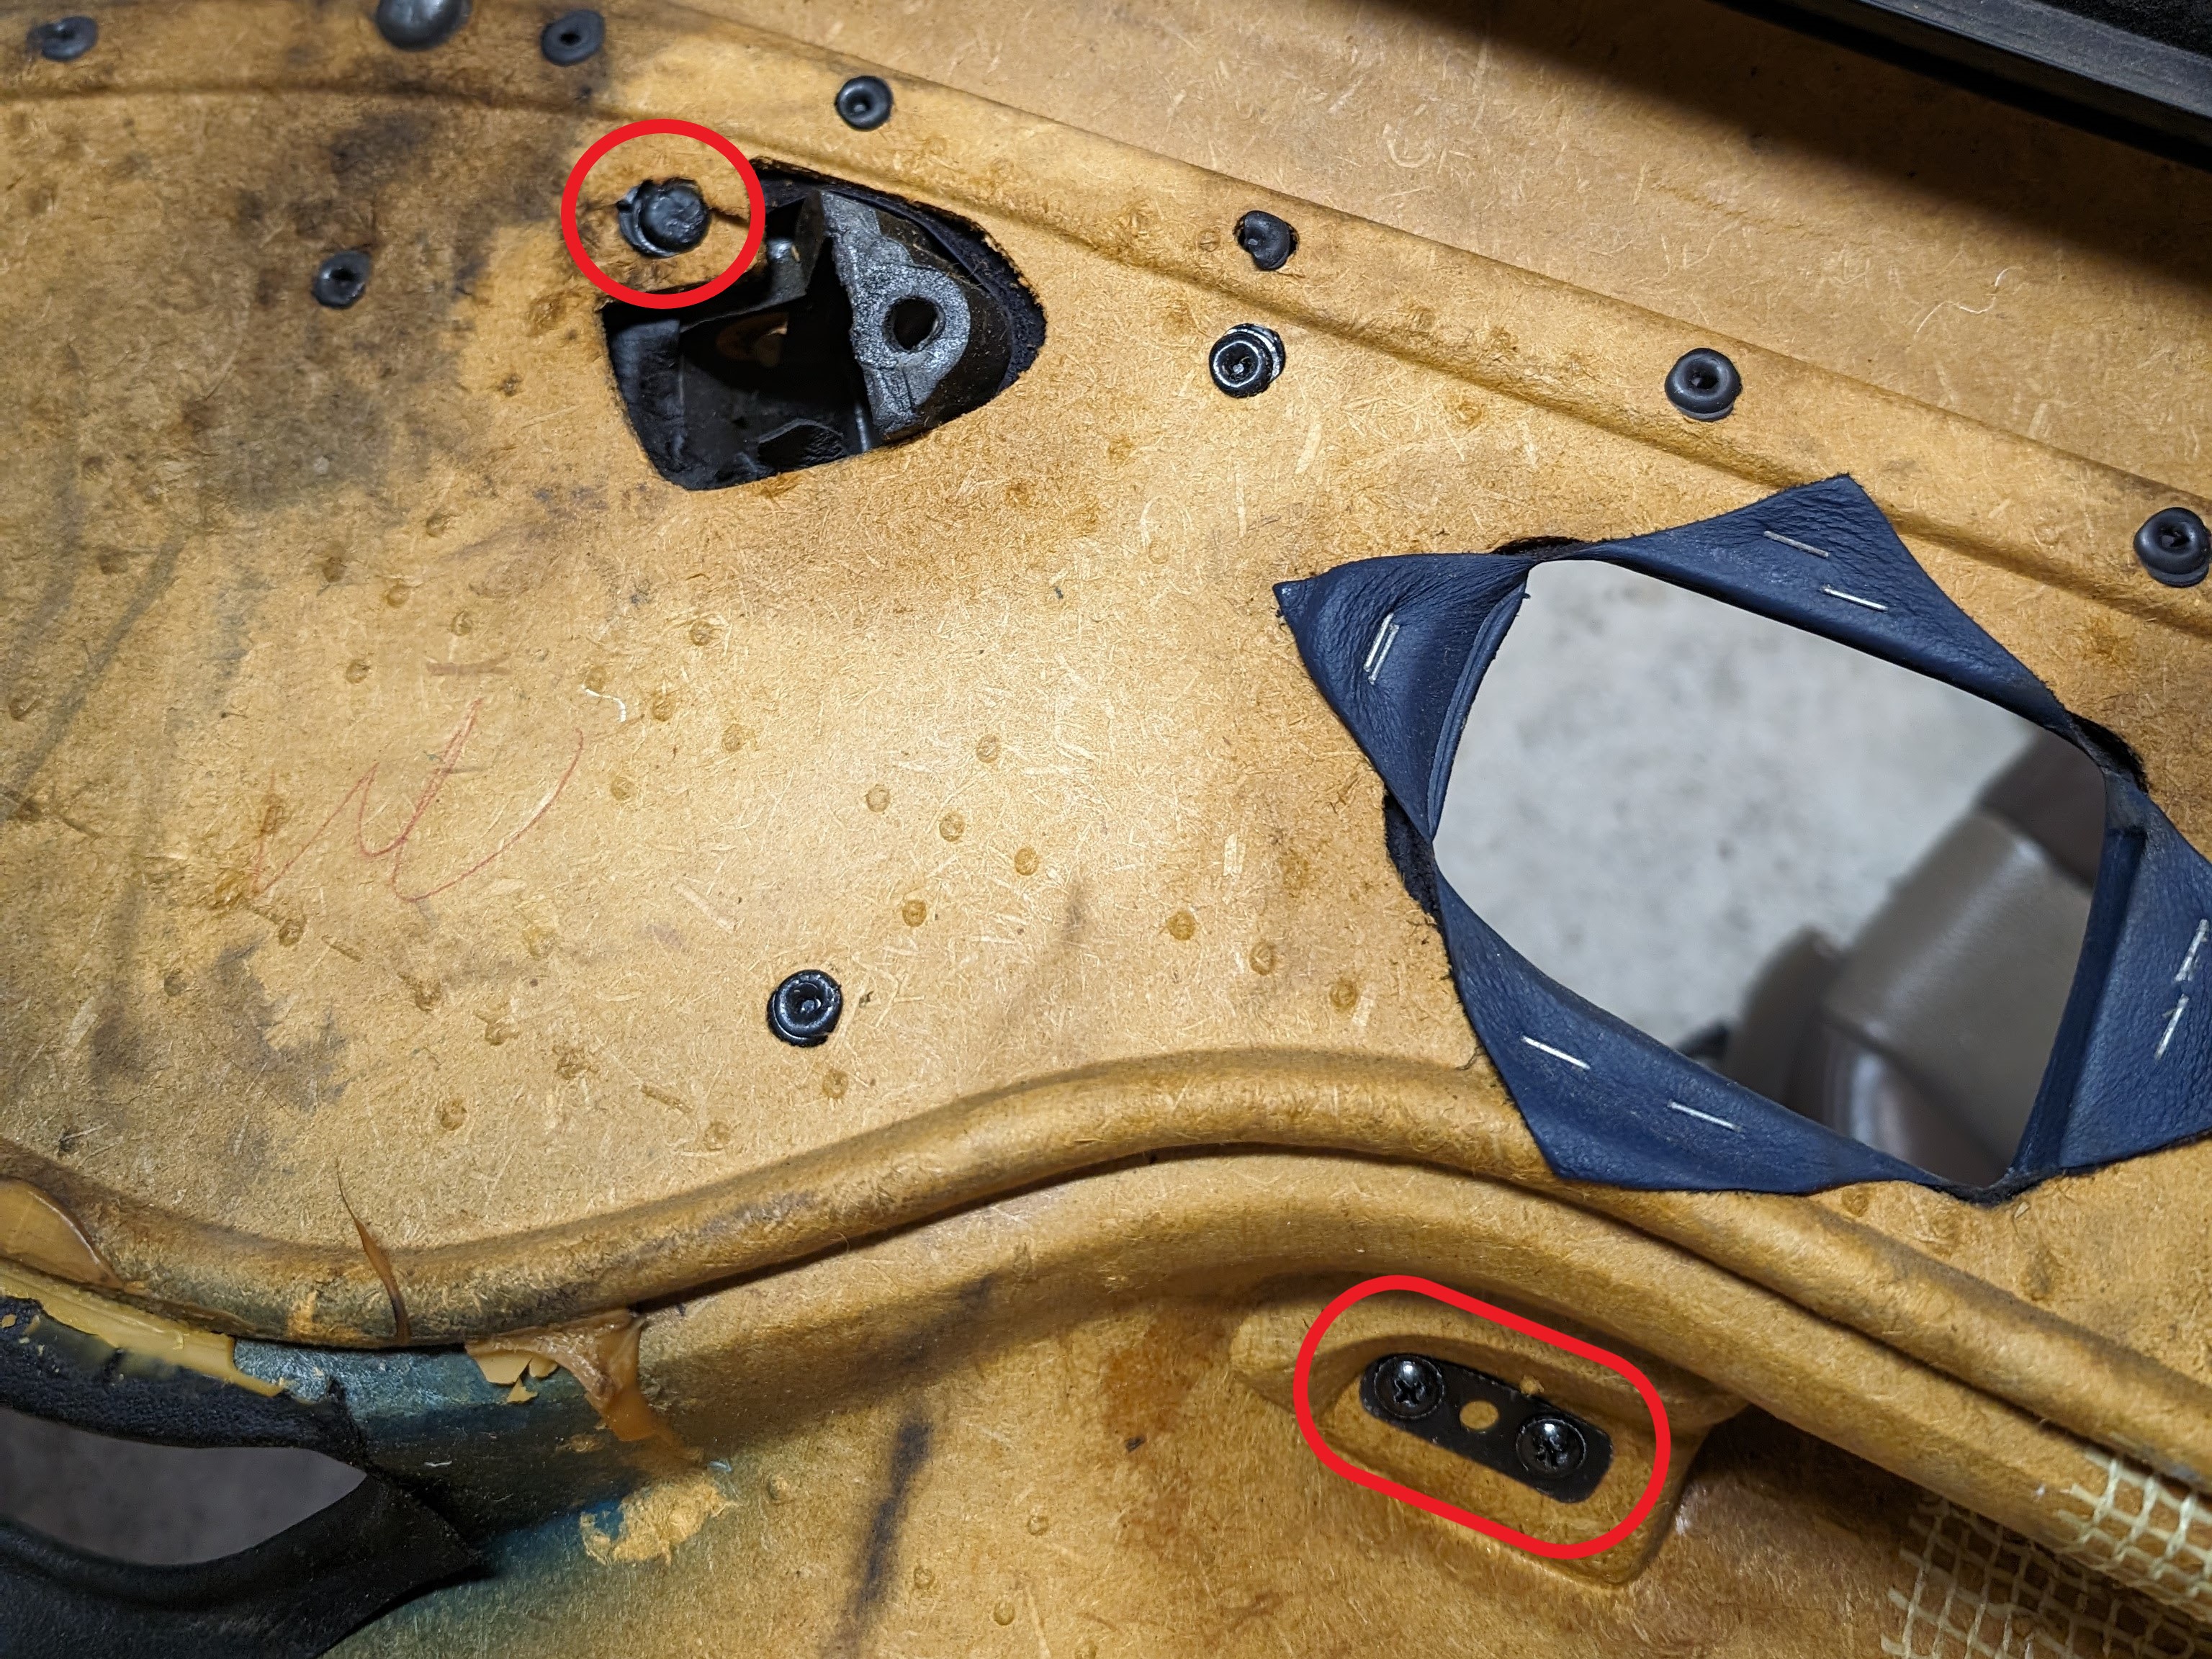

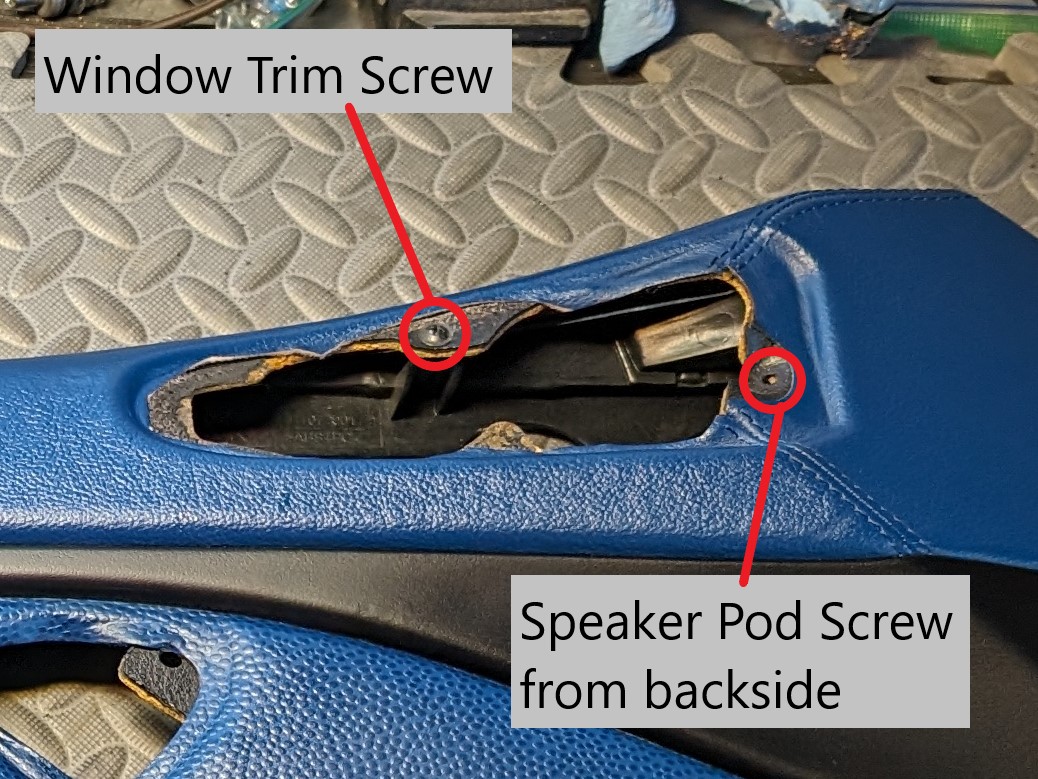
- As needed to re-adhere, on the door side of the door card there is the window trim that is glued to the door card and is held in place by one screw. The small triangle cover does not need to be removed to detach it from the door card. The screw is on the cabin side of the door card in the area covered by the speaker grill if not previously removed. Remove the single screw and if the glue is factory it should remove easily from the door card.
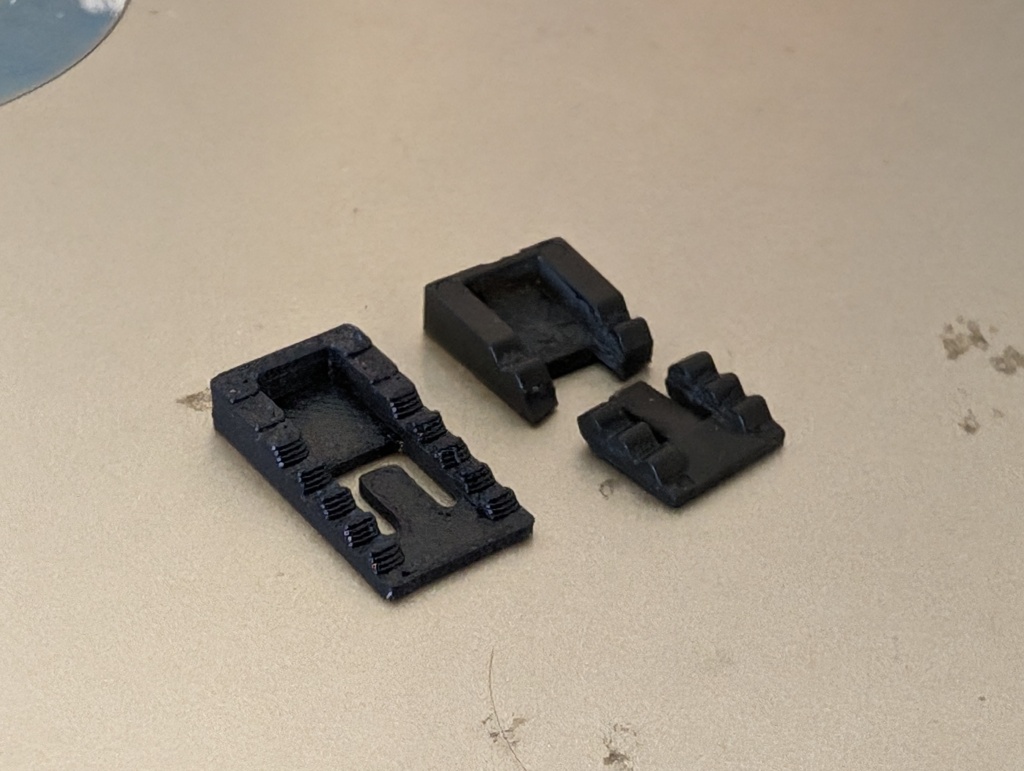
- The door trim triangle “beauty cover” is held to the window trim by 3 tabs that are now easily depressed and removed as needed. These tabs are fragile and likely will break. There are 3D printable replacement tabs on the downloadable content page.
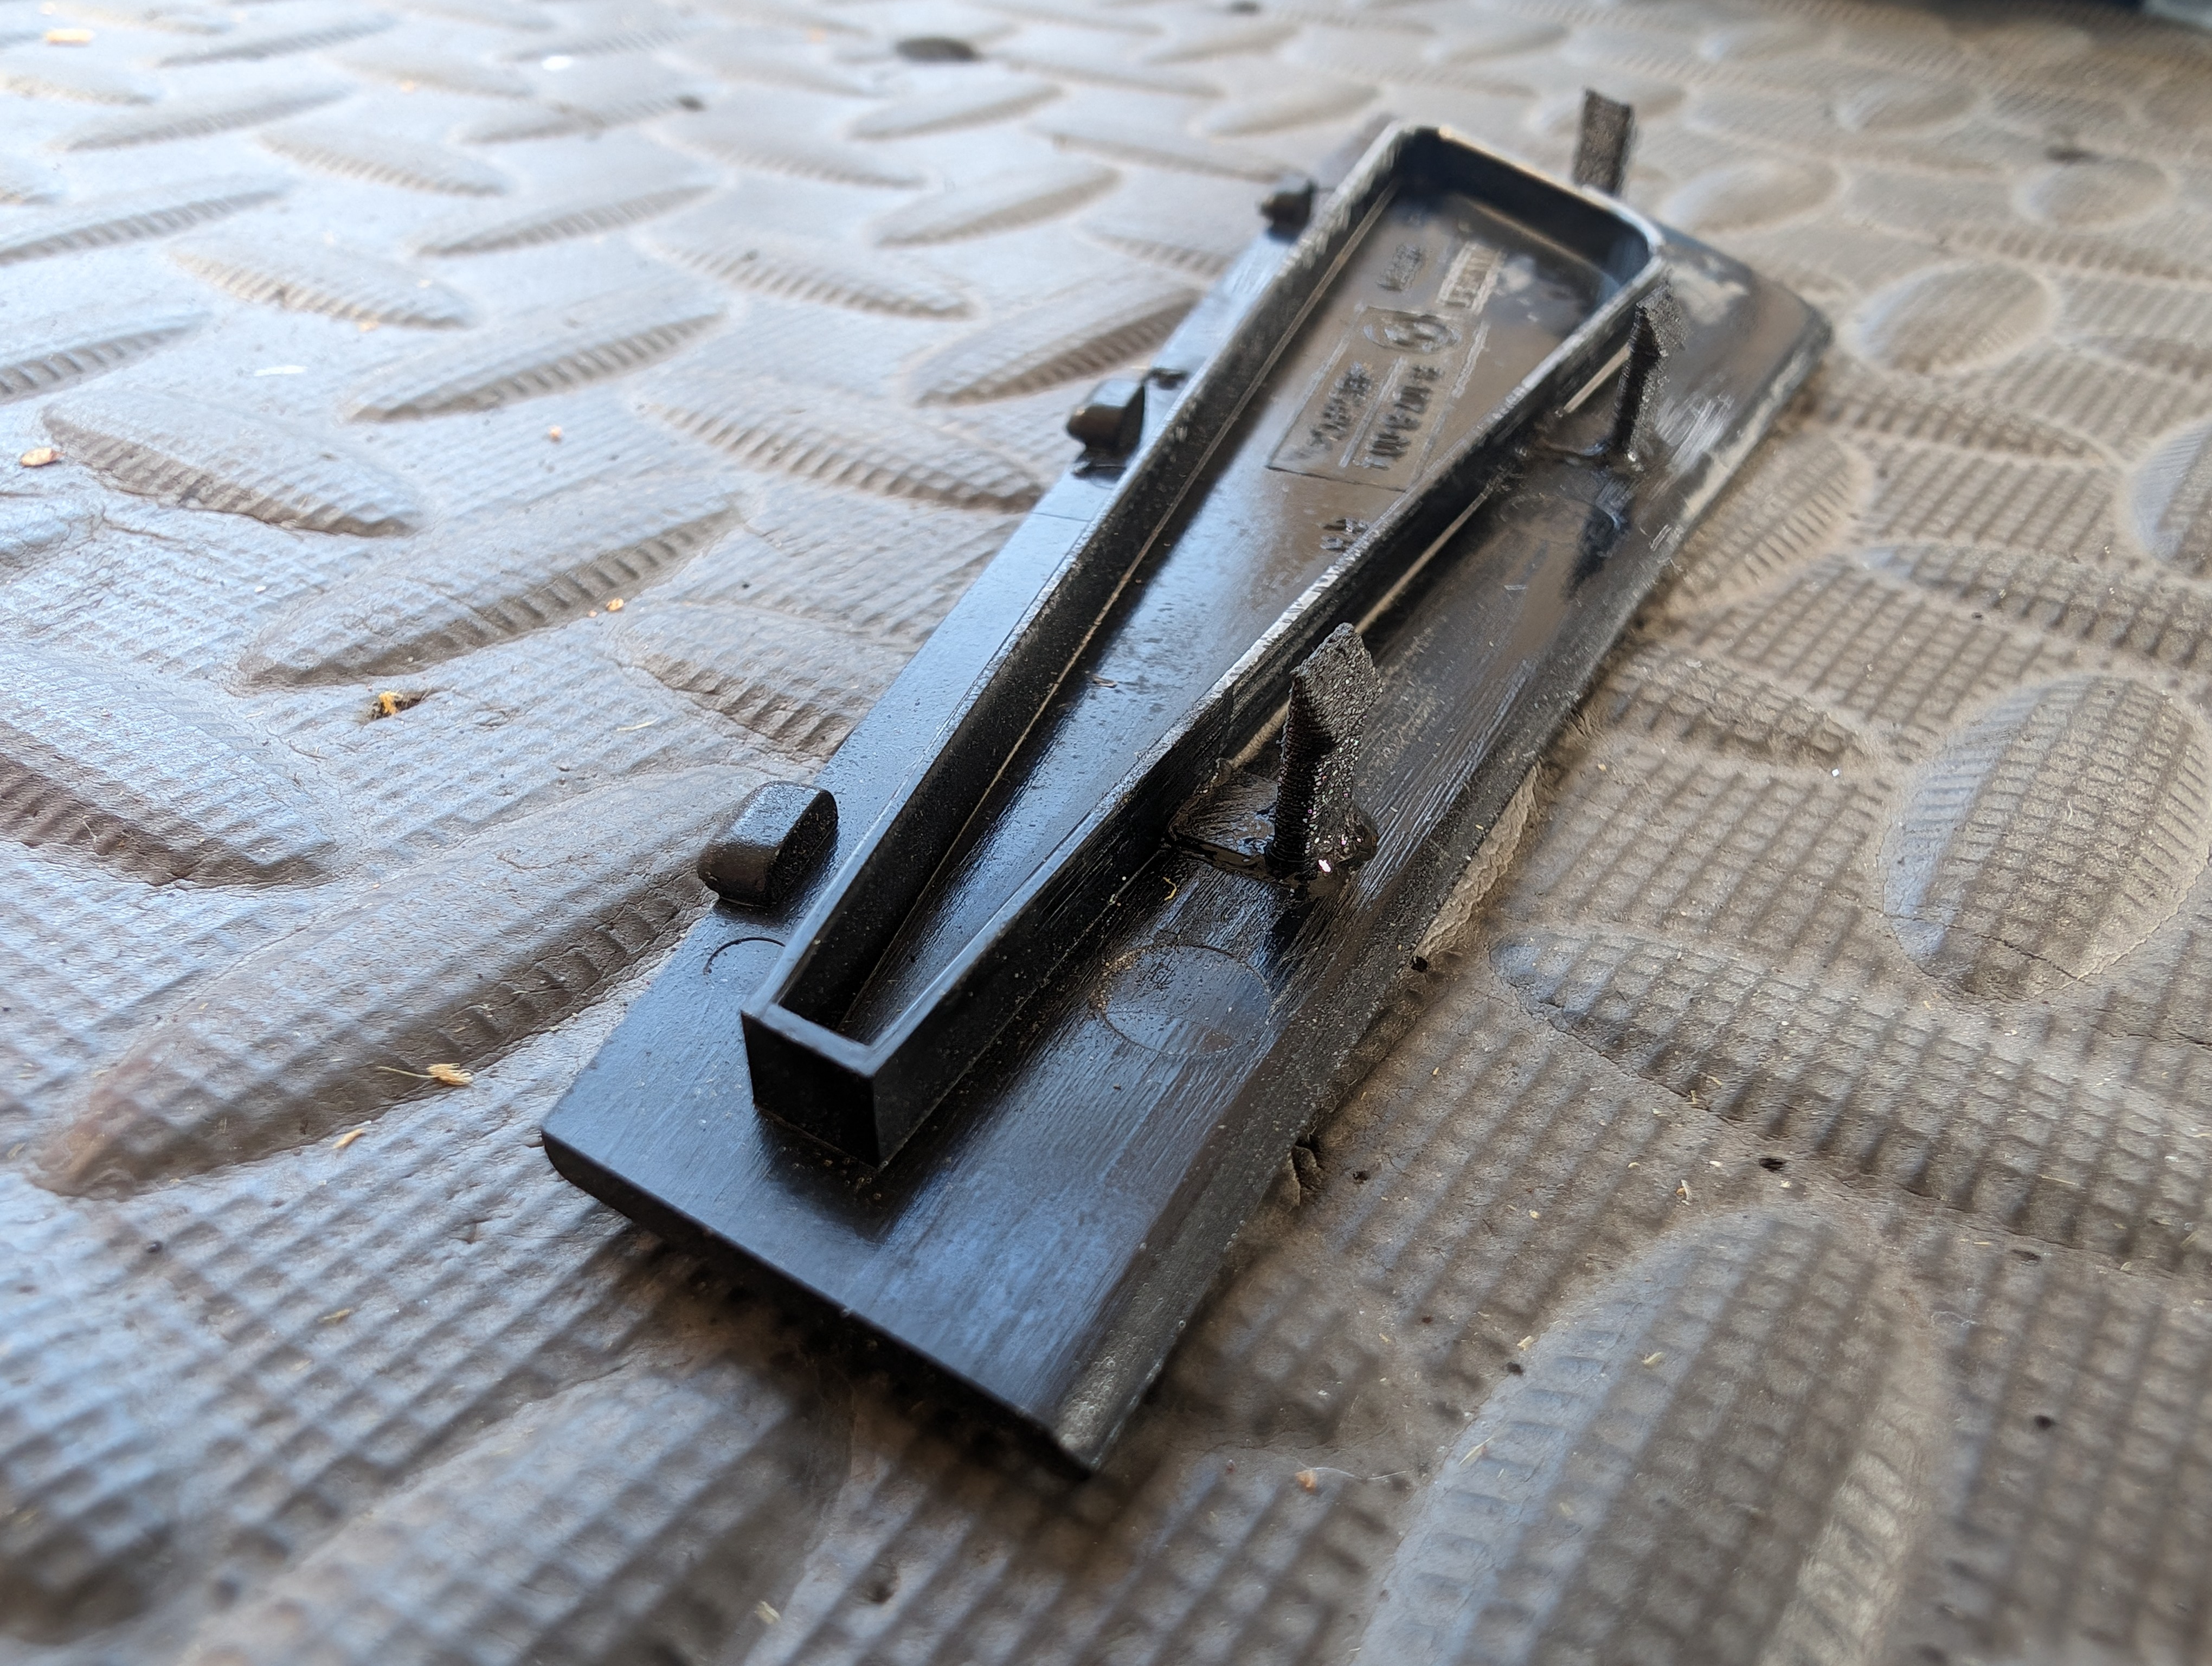
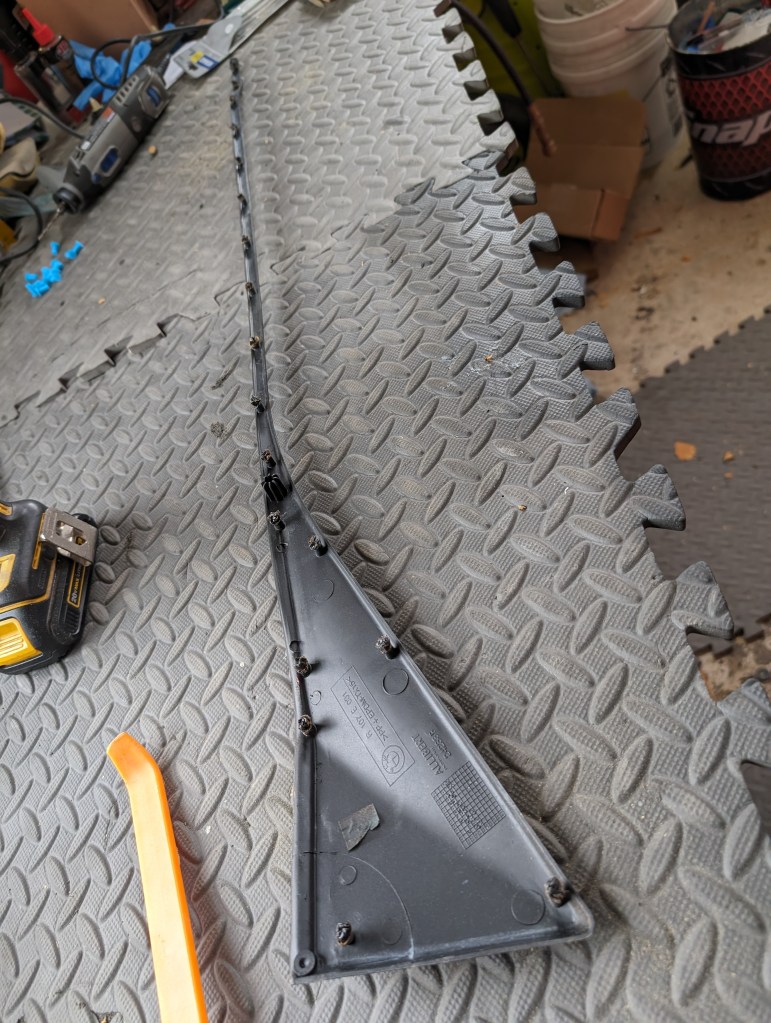
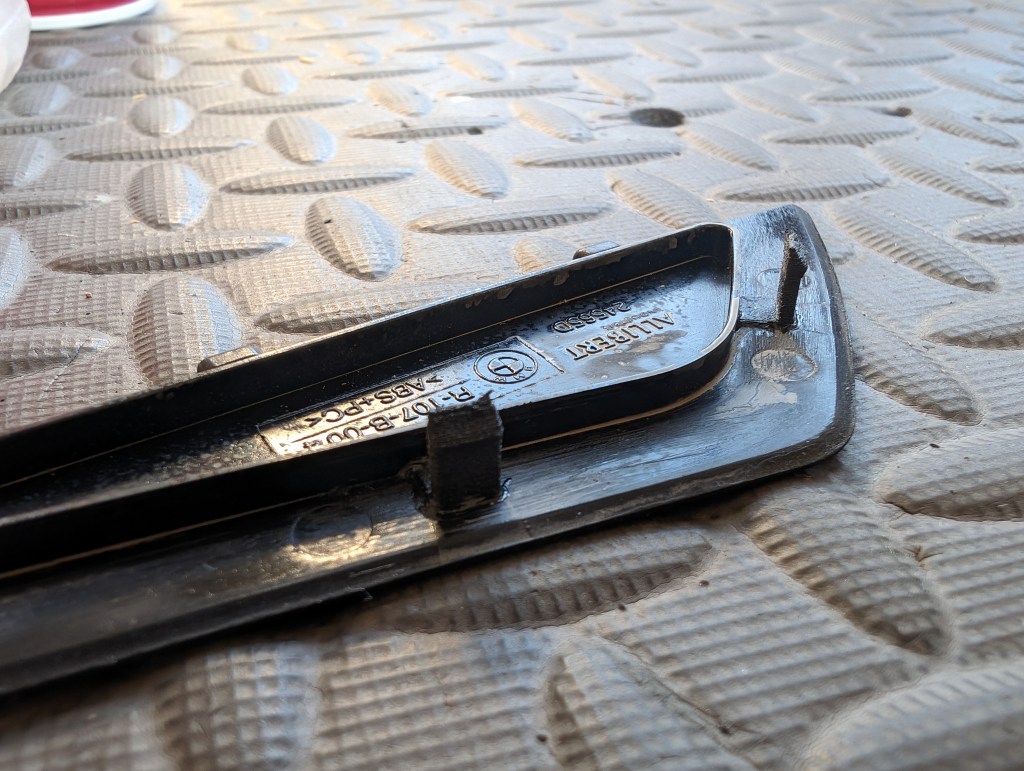
- The door trim (hockey stick) is removed next. It is held into the door card by 18 melted studs.
CAUTION: I use a half face respirator when melting the plastics parts, please use PPE during the plastic melting
Using the wood iron, melt the flared stud back towards the center of the stud to allow passage through the card and the door card leather insert. Once the 18 studs are melted back, carefully pull the hockey stick from the door card taking care to support the leather insert as the melted/deformed studs pass through as the leather can be torn if pulled haphazardly.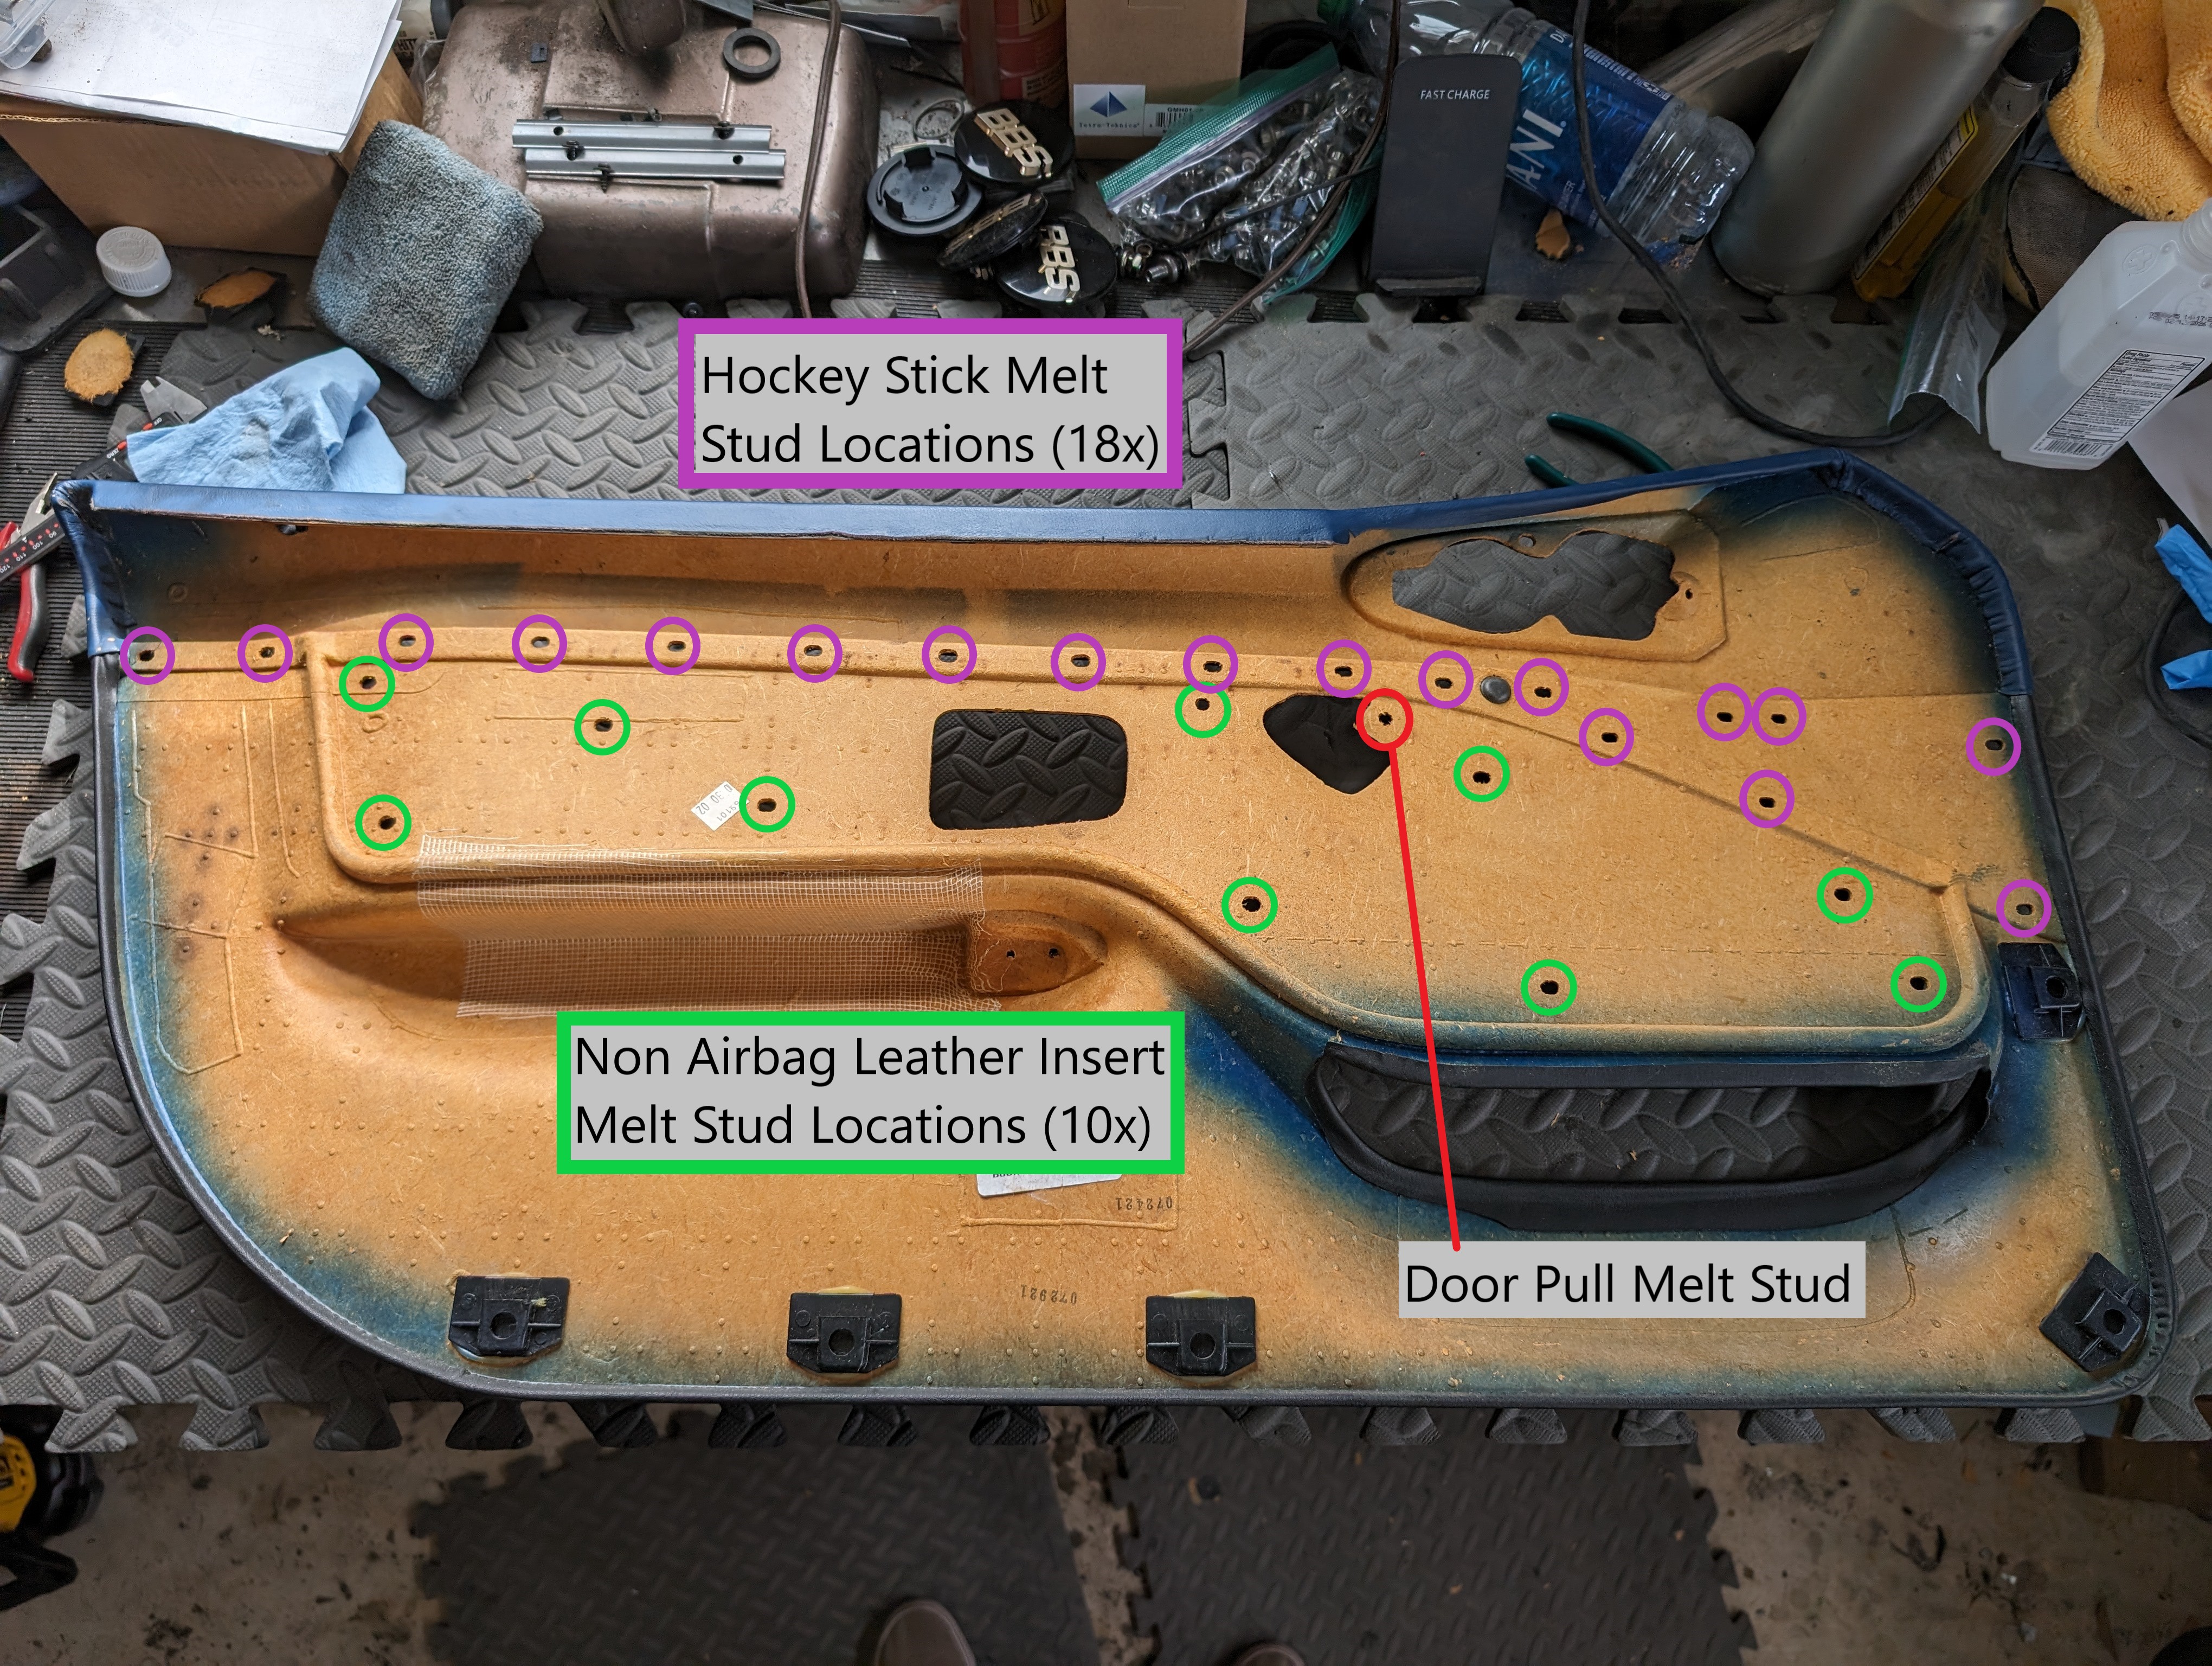

- Next comes the leather inserts
- For NON-AIRBAG panels: The insert is held into the door car by 10 melted studs.
CAUTION: I use a half face respirator when melting the plastics parts, please use PPE during the plastic melting
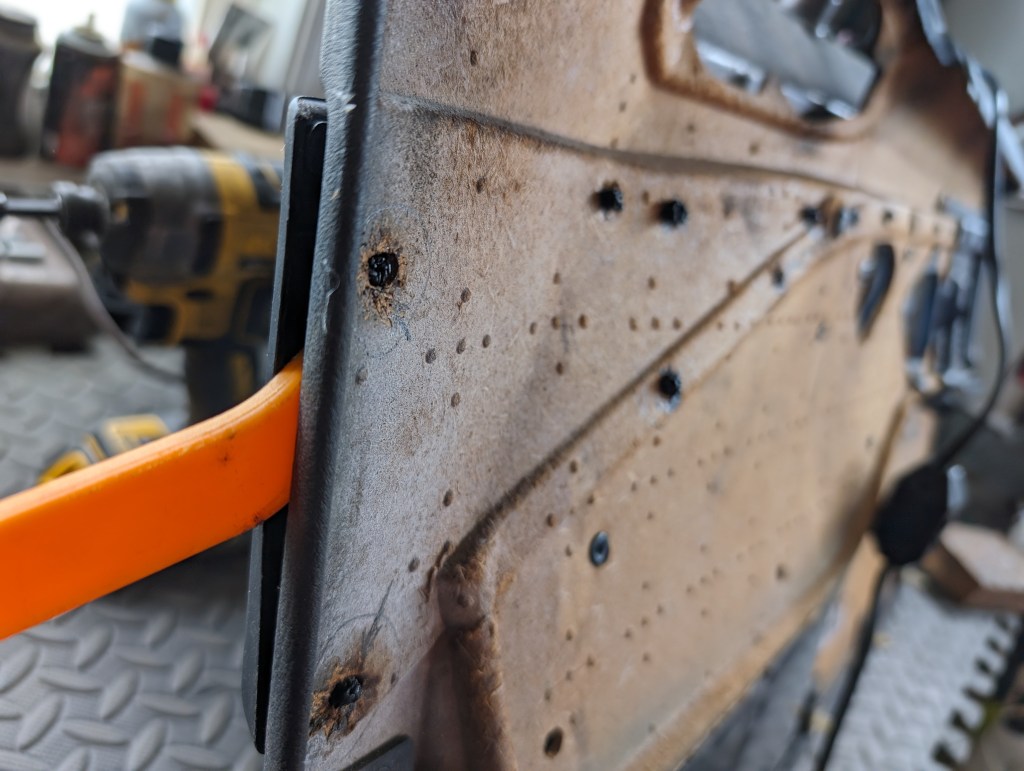
Using the wood iron, melt the flared stud back towards the center of the stud to allow passage through the card. These studs are fragile and are highly likely to snap off flush from the mounting panel. There are 3D printable replacement studs for the insert on the downloadable content page. Pry out the stables holding the insert leather about the door release lever and remove the insert. - For AIRBAG panels: The front insert is held into the door car by 8 melted studs.
CAUTION: I use a half face respirator when melting the plastics parts, please use PPE during the plastic melting
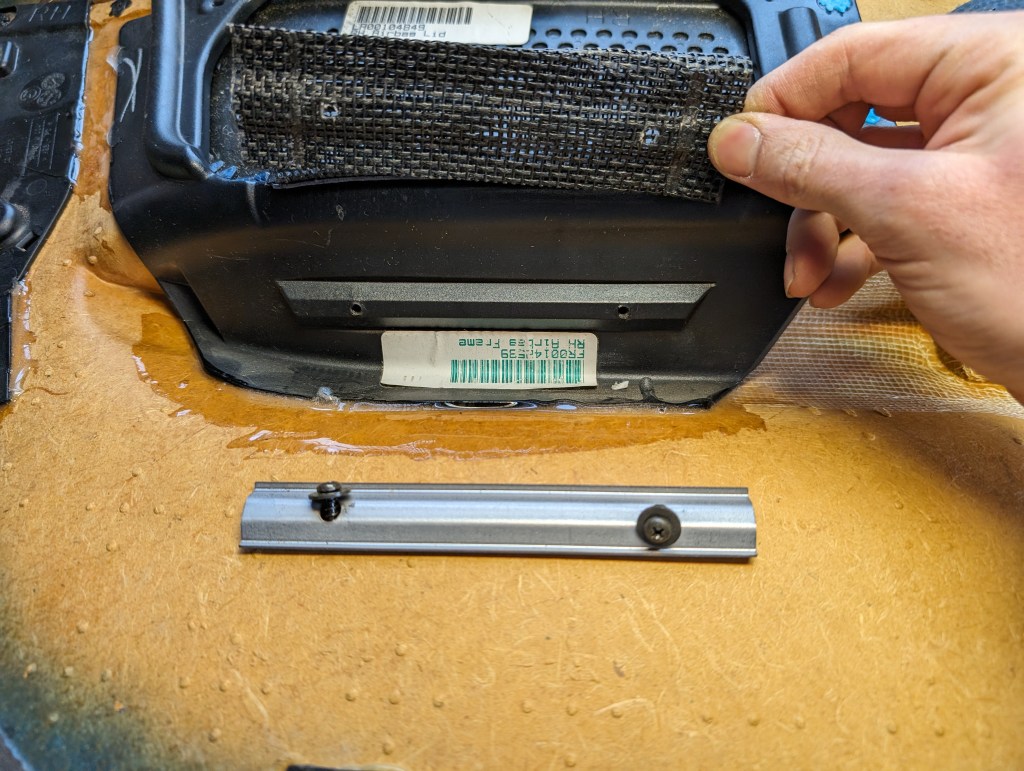
Using the wood iron, melt the flared stud back towards the center of the stud to allow passage through the card. These studs are fragile and are highly likely to snap off flush from the mounting panel. There are 3D printable replacement studs for the insert on the downloadable content page. Pry out the stables holding the insert leather about the door release lever and remove the insert. The airbag cover insert is pressure clipped at the two top corners and has a netting to ensure it doesn’t turn into shrapnel if deployed. The netting is held by a reinforcement bar and two phillips screws on the door side of the card. Remove the two screws and bar to detach it from the mounting ring. Applying slight pressure from the back of the cover at the two top corners the panel should detach from the mounting ring and pivot down and be removable.
- For NON-AIRBAG panels: The insert is held into the door car by 10 melted studs.

- The door pockets/panel clip mounts/airbag mounts are adhered directly to the door card with factory glue that has likely gone rotten, remove as necessary to reapply.
- The door card should be broken down completely at this point.
Preparations for reassembly/Refurbishment:
- Plastic parts removed in steps 3 & 7: remove all existing adhesive from both the door card and the part itself.
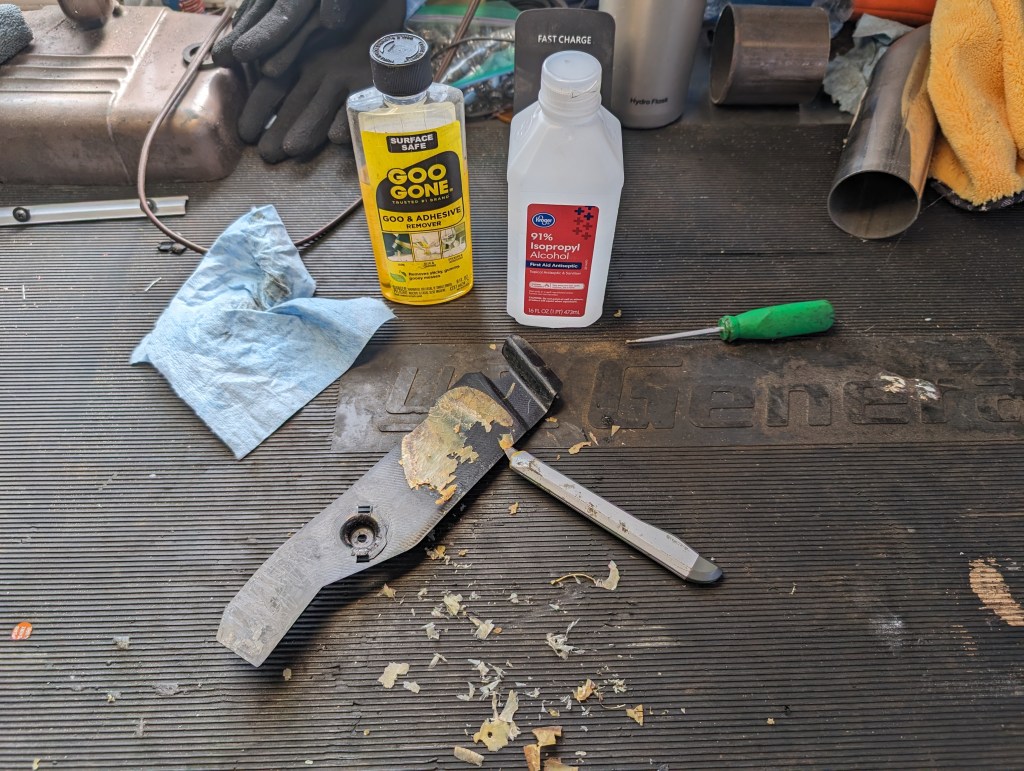
- For the door card a putty/razor knife for removal of bulk adhesive and 80 grit sandpaper should be used to remove small bits and provide a surface profile that promotes re-adhesion.
- For the plastic parts, use of a razor knife and small flat head screwdriver should be used to remove the bulk adhesive and 80 grit sandpaper should be used to remove small bits and provide a surface profile that promotes re-adhesion.
- Use of Goo-Gone, followed up by rubbing alcohol to remove residuals also helps.

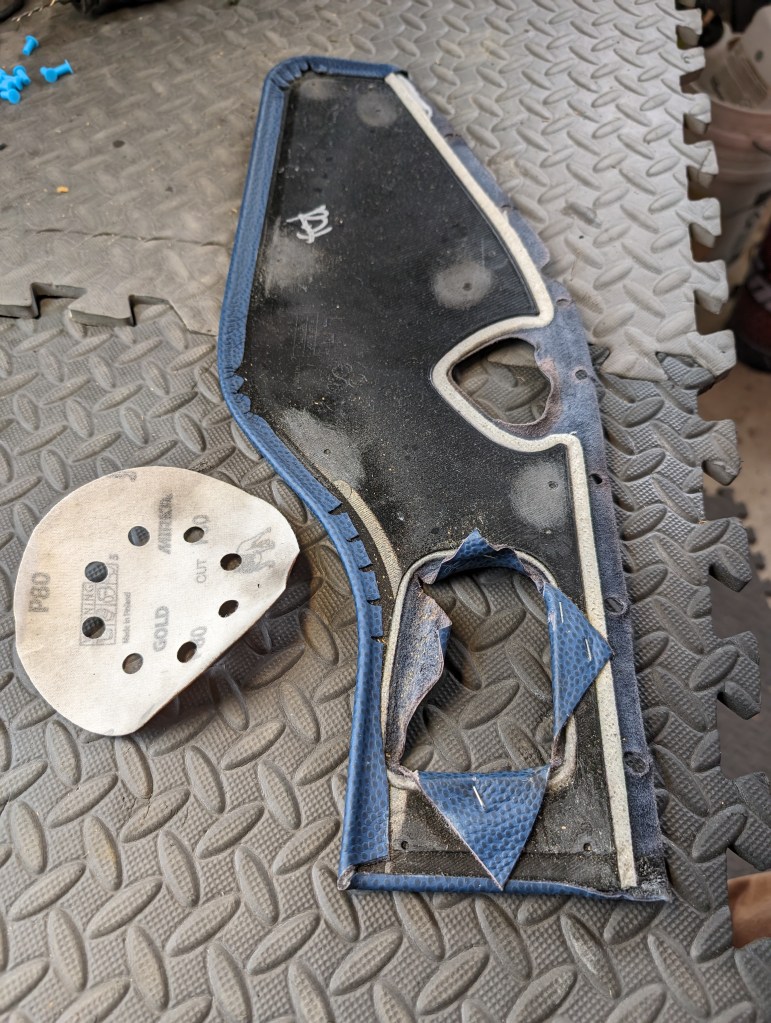
- Leather inserts: replace any broken studs with replacement 3D print studs available on the Downloadable Content page. The plastic backing of the leather insert should be cut flush with a razor knife and scuffed with 80 grit sandpaper. Apply Starbond superglue to the panel and accelerator to the new stud base. Join the two and hold pressure for a few seconds to join the pieces. Any existing studs that were previously flared should have the flare section formed back into the best resemblance of a solid straight stud prior to reassembly.


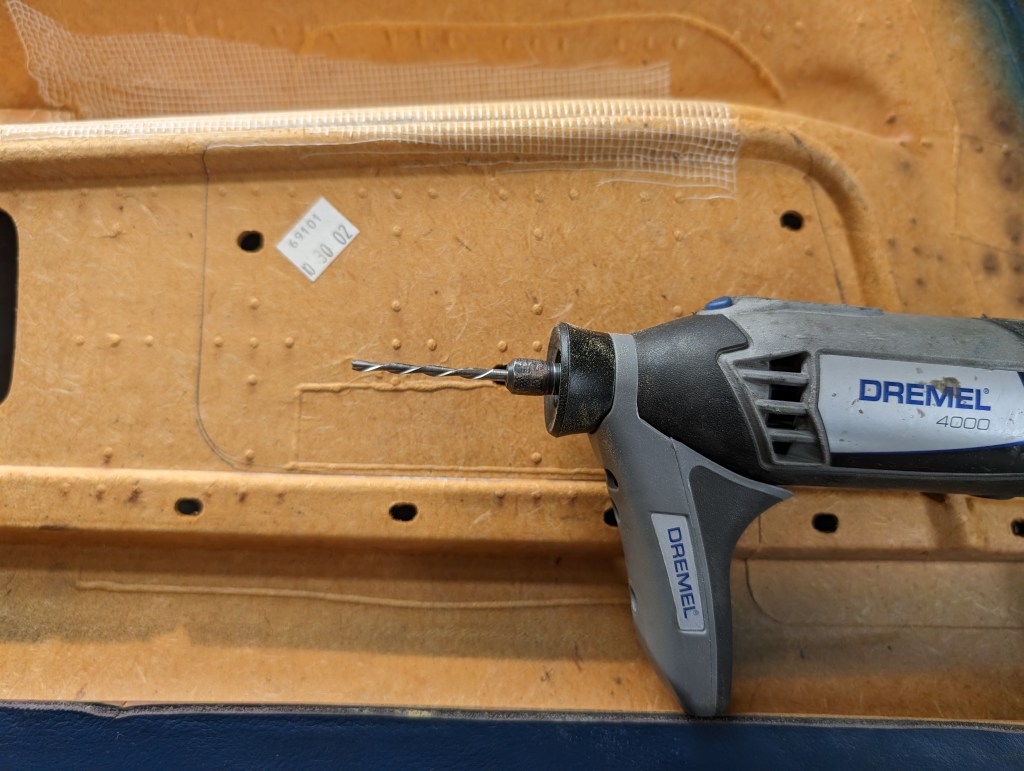
- Door pulls: For cases where the melt stud has broken off, I previously repaired my own broken pull with installing an M7 stud in its place. Drill and tap the existing broken melt stud out of the top of the handle. Use care to ensure the drill depth does not exceed the front side of the handle. Using the epoxy, or similar adhesive install the stud into the door pull and allow to cure. Once set, the handle is now mechanically joined with a washer and nut to the door card at the top and can be removed as needed. [I don’t have photos of this yet since Photobucket lost my old media]
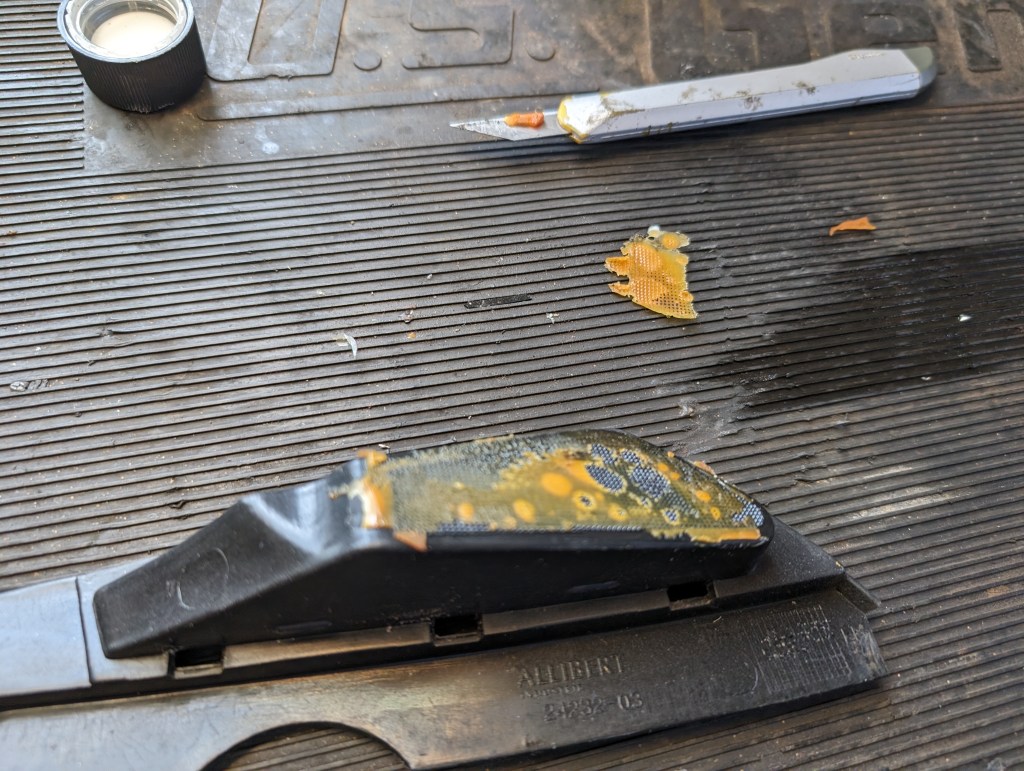
- Window trim triangles: Chances are one or all of your triangle clips are broken, there is a replacement 3D print clip available on the Downloadable Content page. Similar to the rest of the parts, cut remnants with a razor knife flush, scuff with 8 grit sandpaper, apply Starbond to the triangle and accelerator to the 3D part, and reattach.

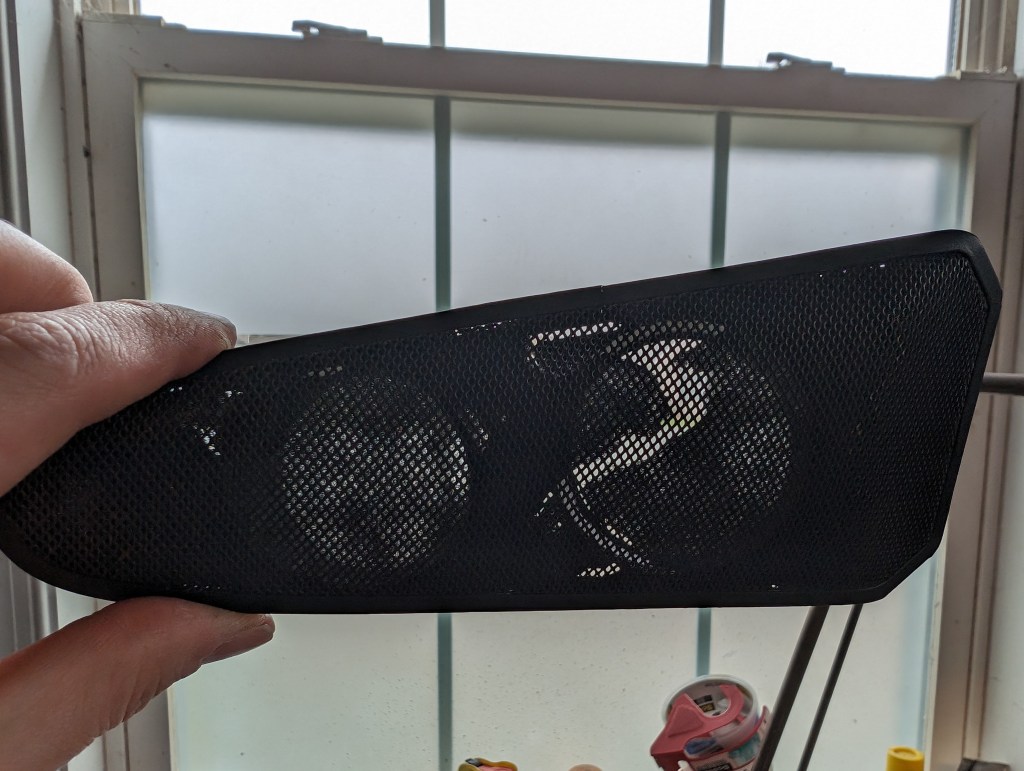
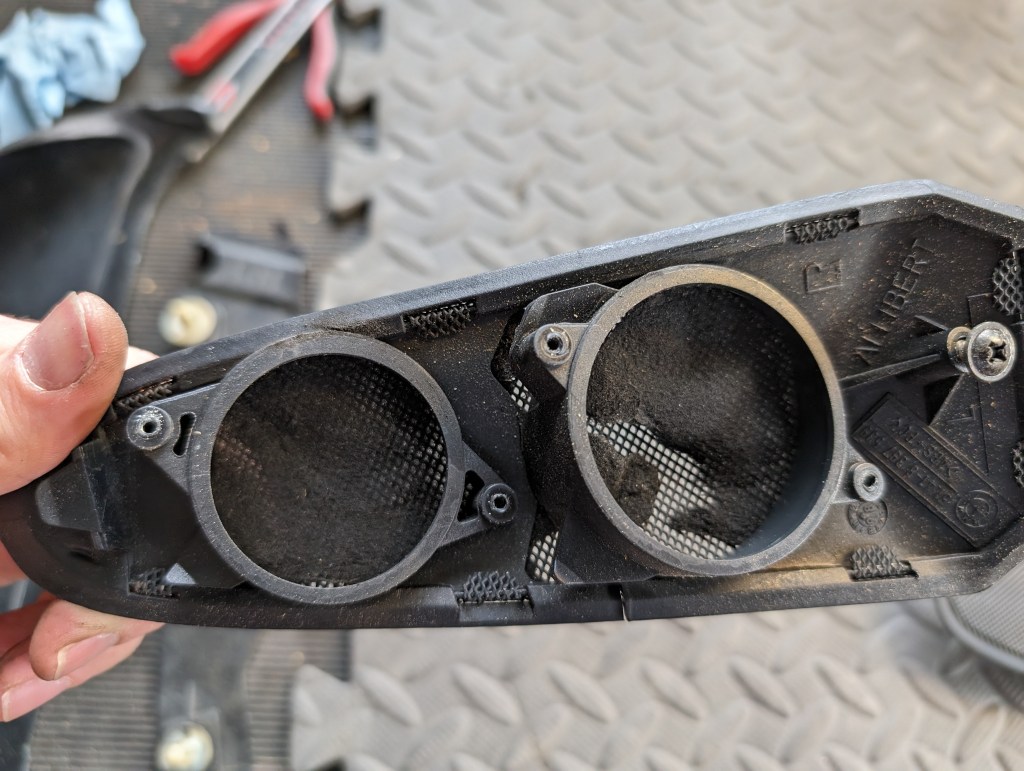
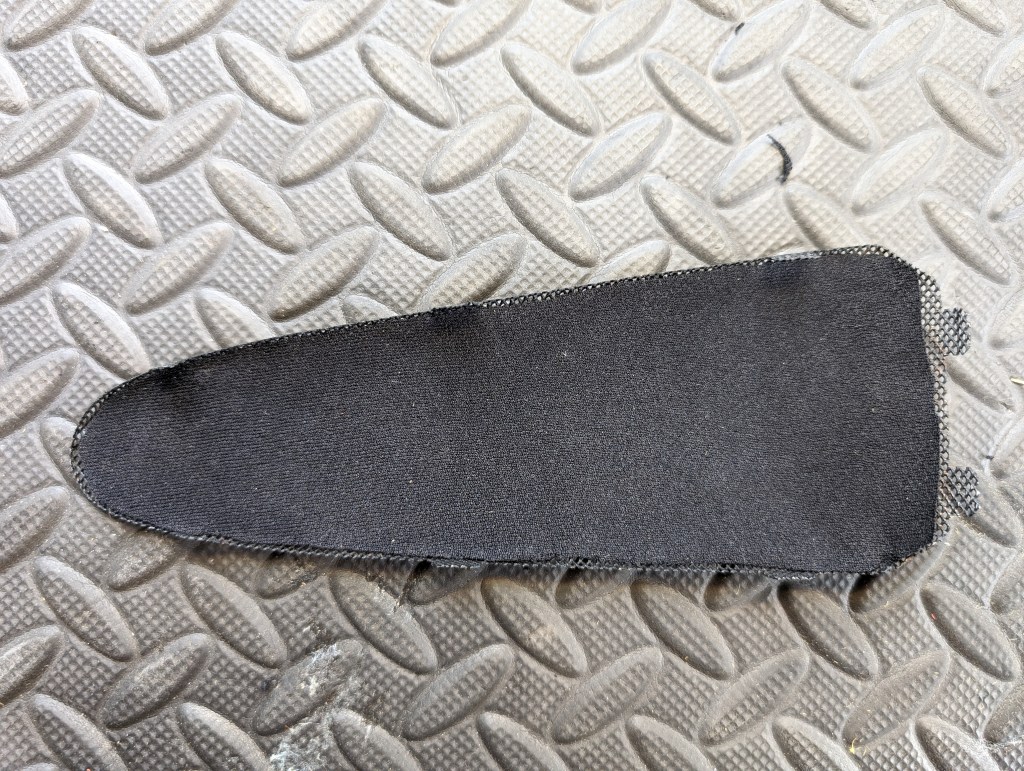
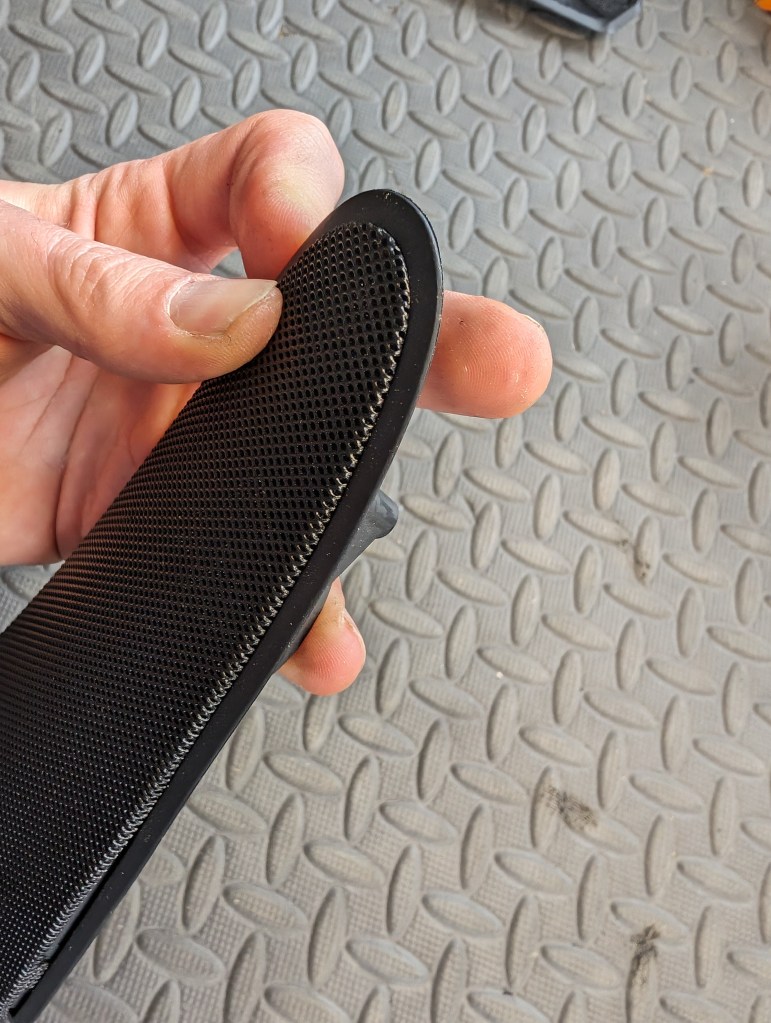
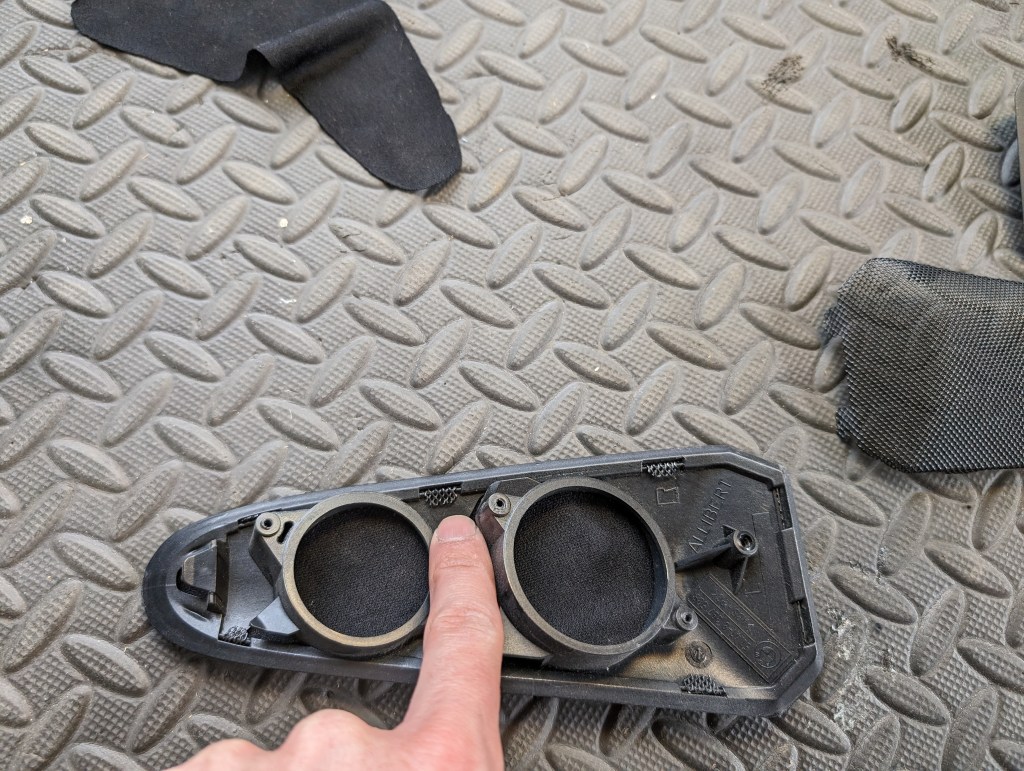
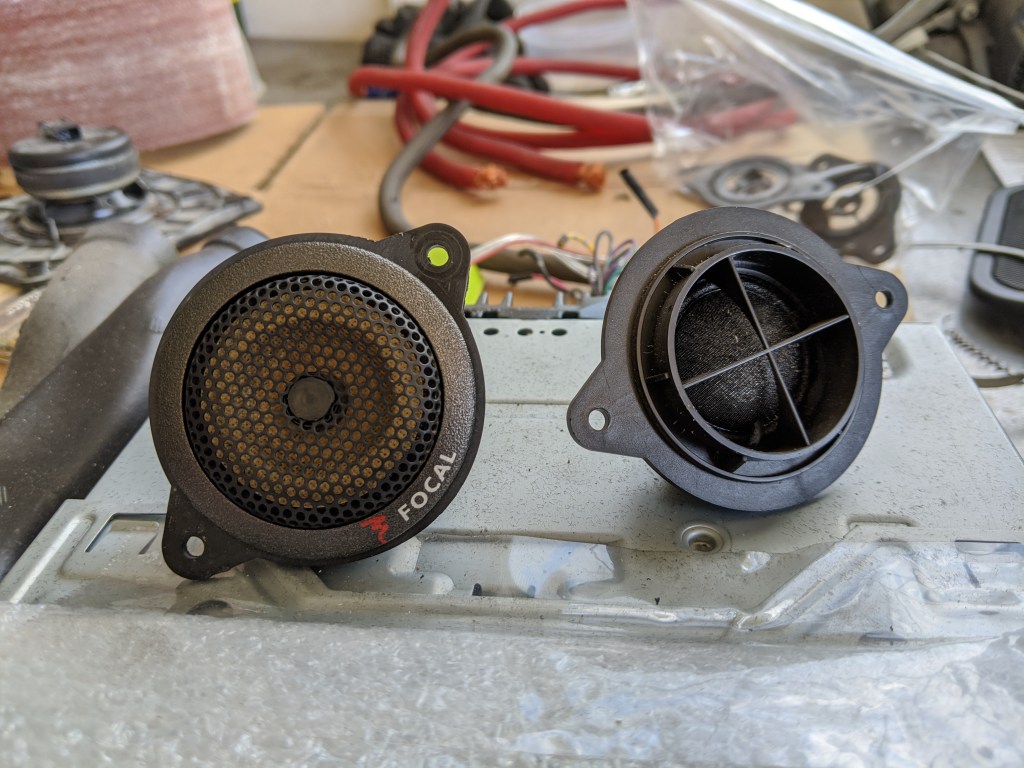
- Speakers & grills: 99% chance that the foam used to obscure the speakers has degraded to non-existenance at this point. Some remove it completely to visibly see the original (or aftermarket) speakers and get rid of the messiness of the degrading foam. I prefer a “stealth” install an replaced the degraded foam with acoustic fabric. The metal grill may also need to be scuffed and repainted due to rust/corrosion products. To disassemble the assembly, the speaker grill is removed via unbending the metal taps to allow it to be pulled from the plastic frame. Using a broad nose pry tool and pliers align the tabs with the slots to allow removal. The grille can be wire brushed and re-sprayed as needed, taking care to protect the bend tabs as they can be over flexed and broken at their folds. The fabric should be cut slightly smaller than the 90 degree bends of the grill to hold itself in place when installed and cover the needed holes in the plastic mount. If you’re installing aftermarket speakers here, the mid-range speaker can be destructively removed from its mounting ring and with the flush-mount tweeter cup, an aftermarket tweeter can been installed in it’s place. A future DBG project will be to produce 3D printed mounts that are fit to whatever cup size needed without the need to sacrifice the original speaker. Reassemble in reverse order.


- Door trim (hockey sticks): using the wood iron any existing studs that were previously flared should have the flare section formed back into the best resemblance of a solid straight stud prior to reassembly.


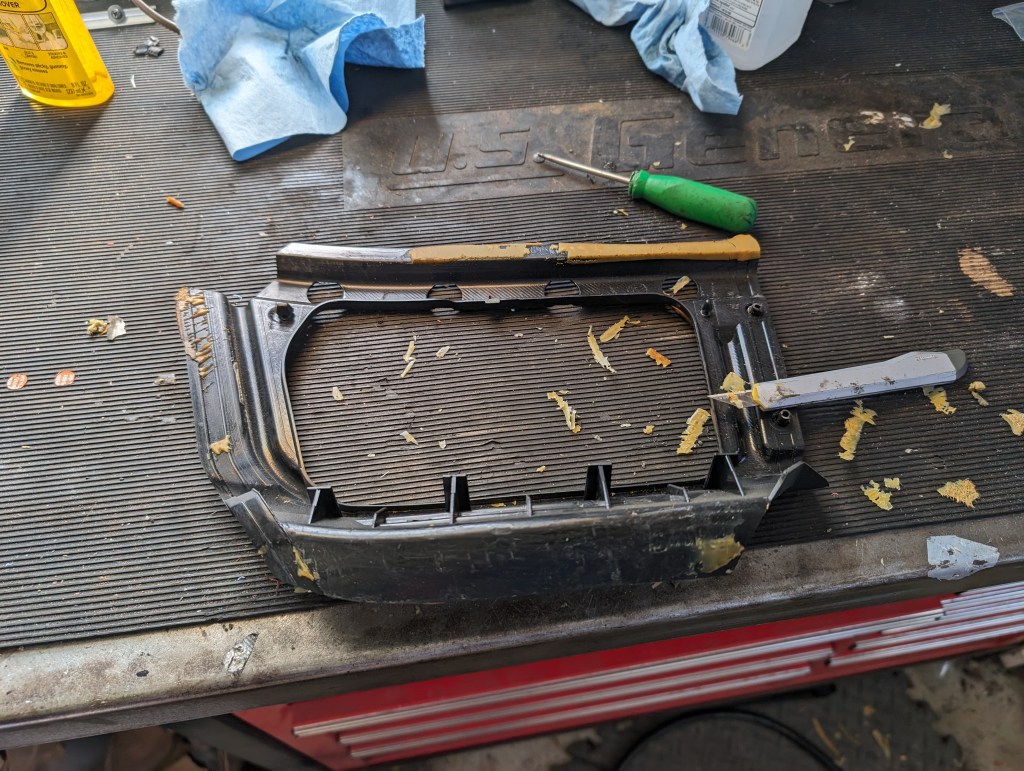
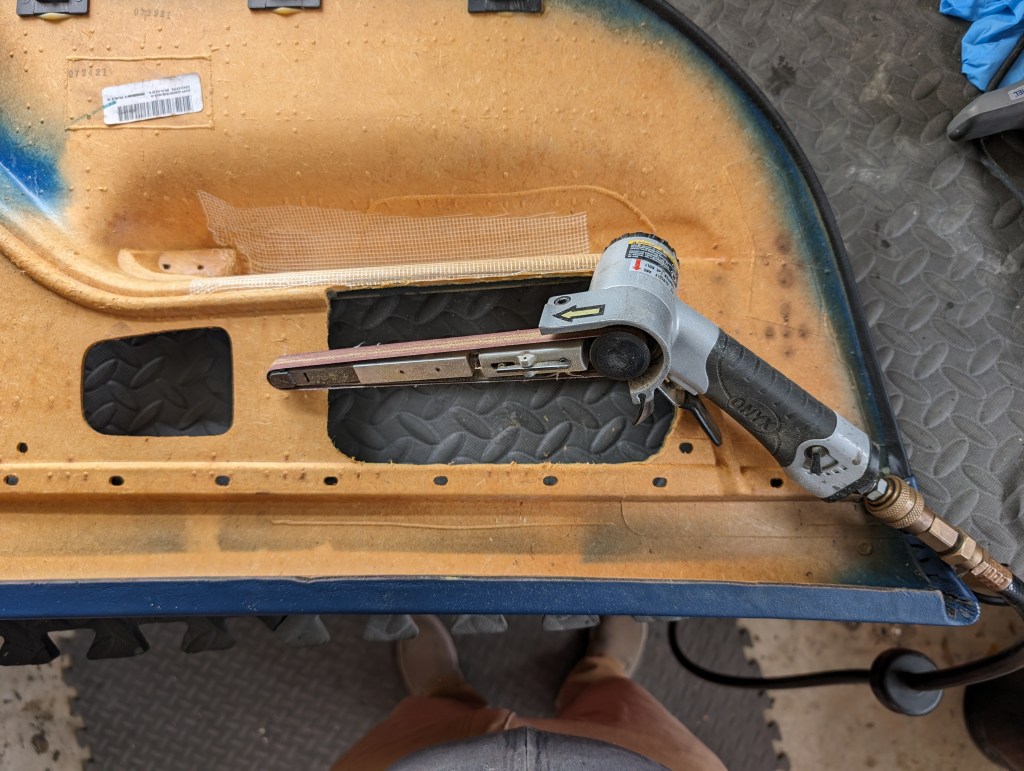
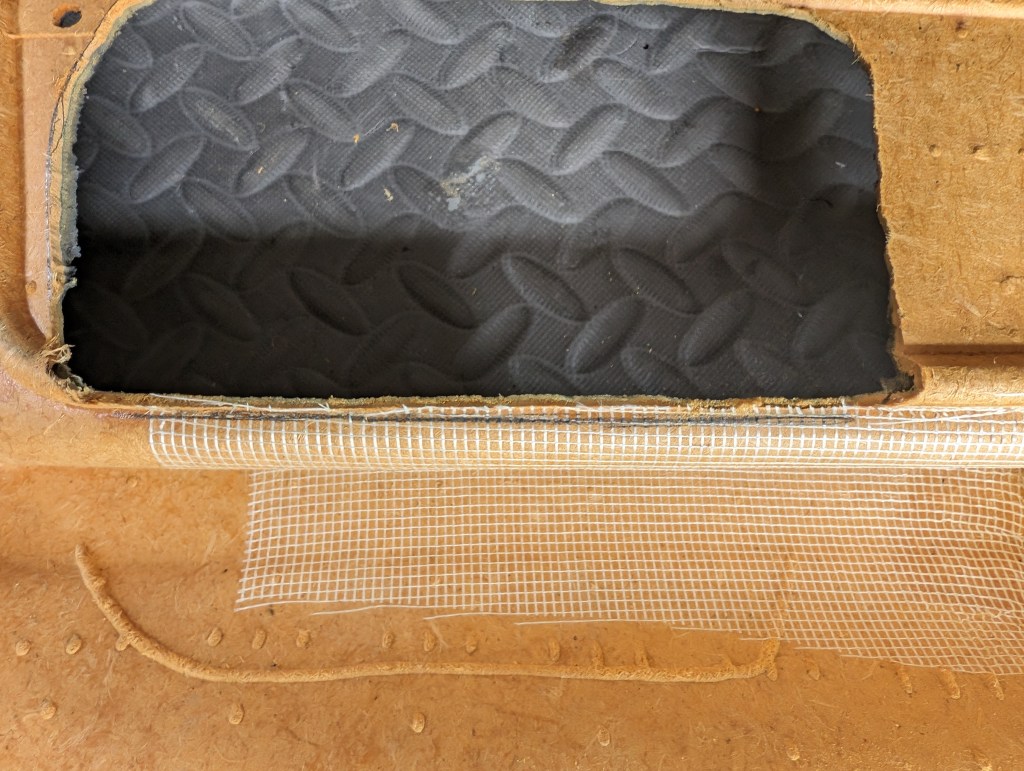
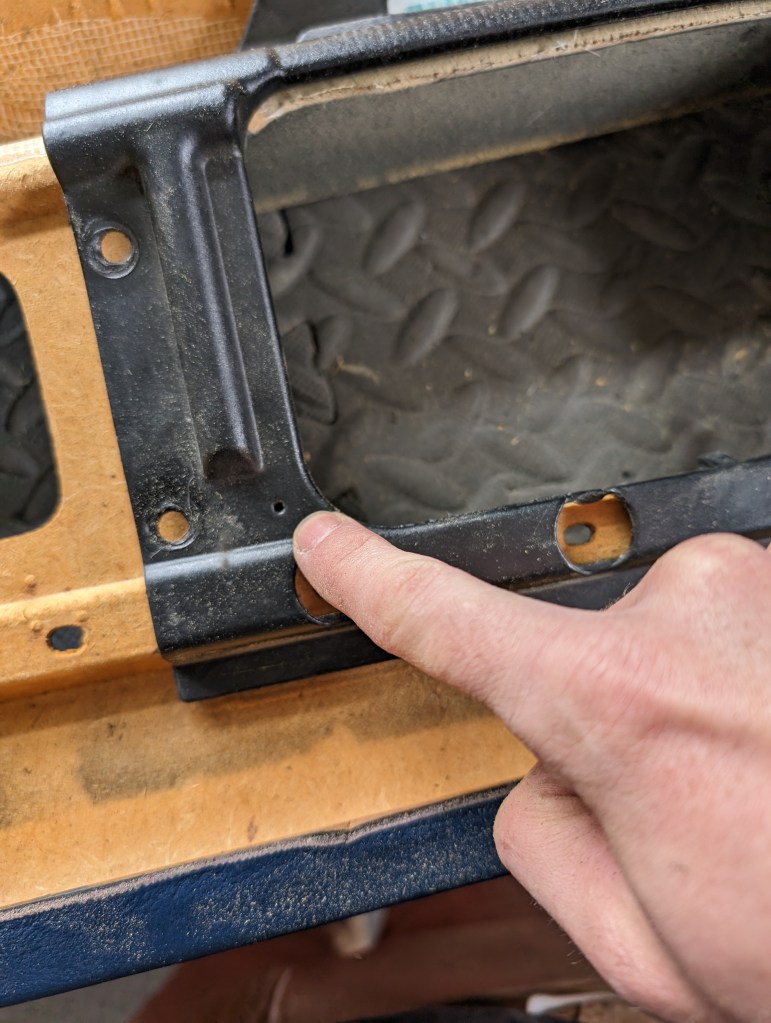
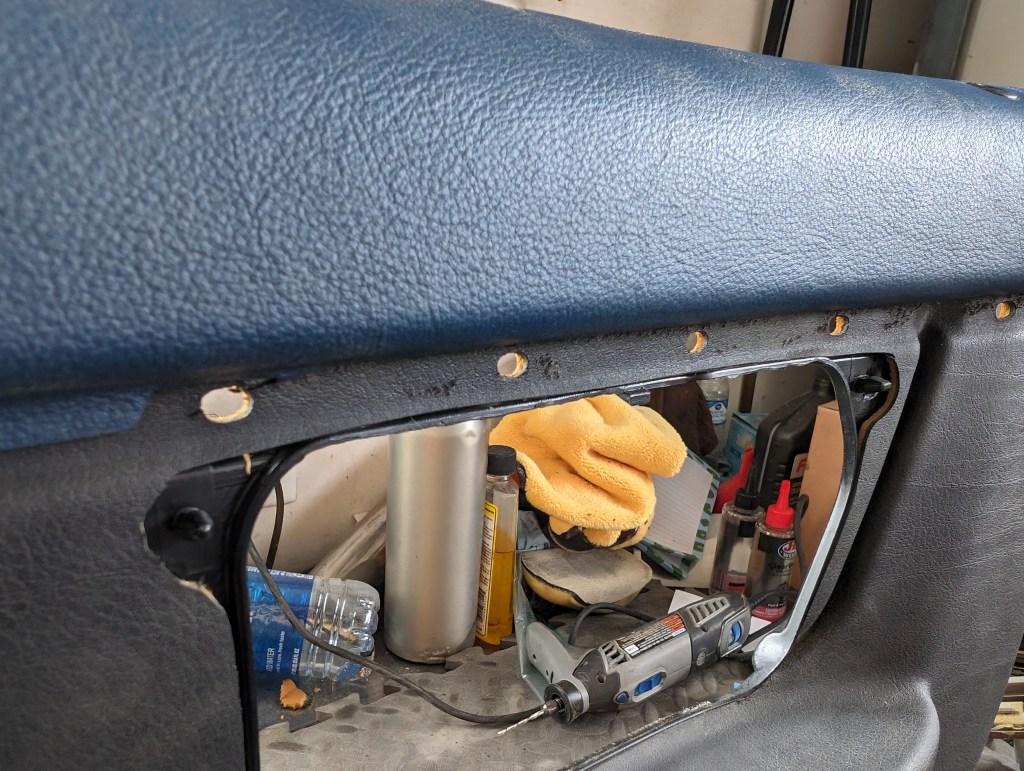
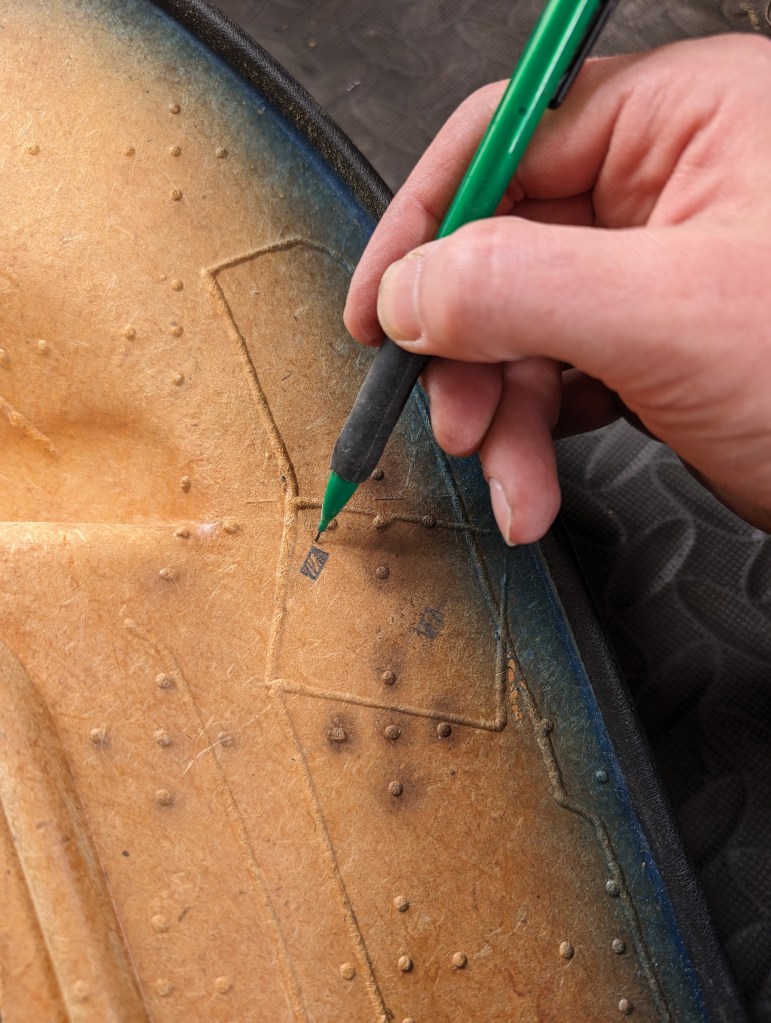
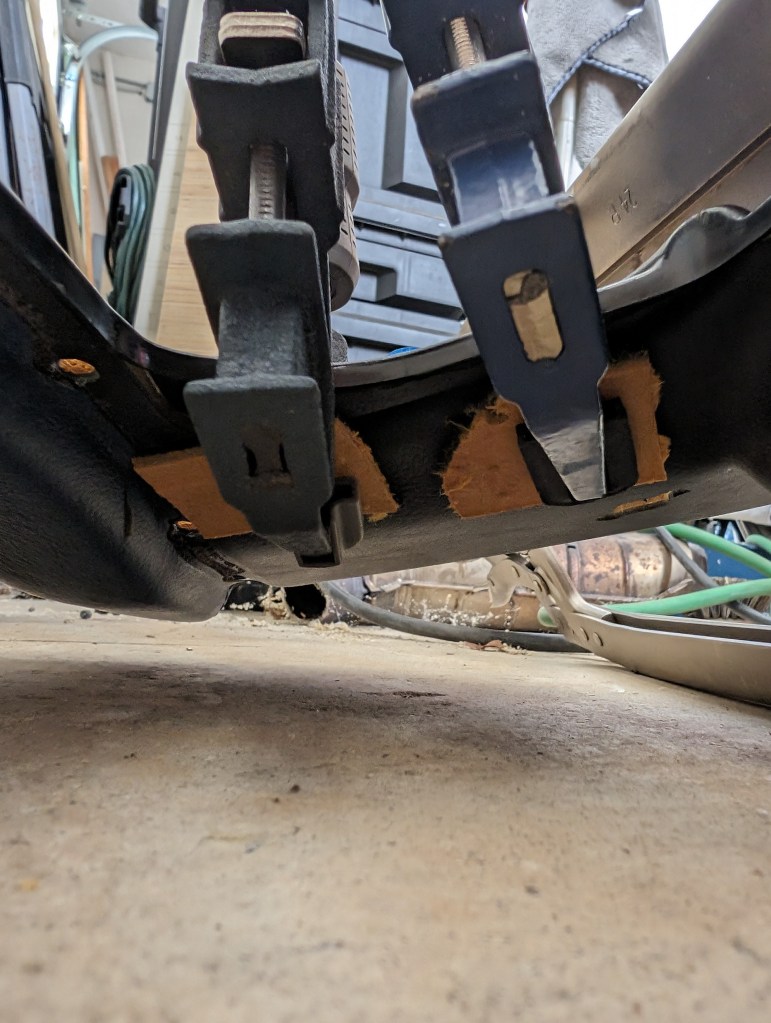
- Airbag retrofit of pre-airbag cards: Four holes need to be made into the pre-airbag door card to accept the airbag parts, one for the airbag itself, one for the airbag tab/mount screw to ensure the door card remains in place if the airbag were ever to deploy, and two small holes for melt studs for the forward leather insert. Using the airbag mount frame as the guide, trace the rough dimension of the hole. Using the Dremel and 561 cutting bit, remove the card material. Care should be taken when cutting the lower edge of the door card to ensure the 561 bit does not come in accidental contact with the arm rest on the far side. The airbag panel mounts to the frame via two press fit joints, the “ears” have to be removed on this hole to allow these pieces to mate as well. Continue to slowly remove material until the airbag mount frame plastics completely cover the edges of the door card all the way around. TEST FIT FREQUENTLY. Once the airbag frame mount is flush and installed in palace on the door card, mark the two holes on the FWD edge and drill out these holes for the forward leather insert melt studs to pass through. Remove any high vinyl/door card material from both sides with a razor blade as needed.


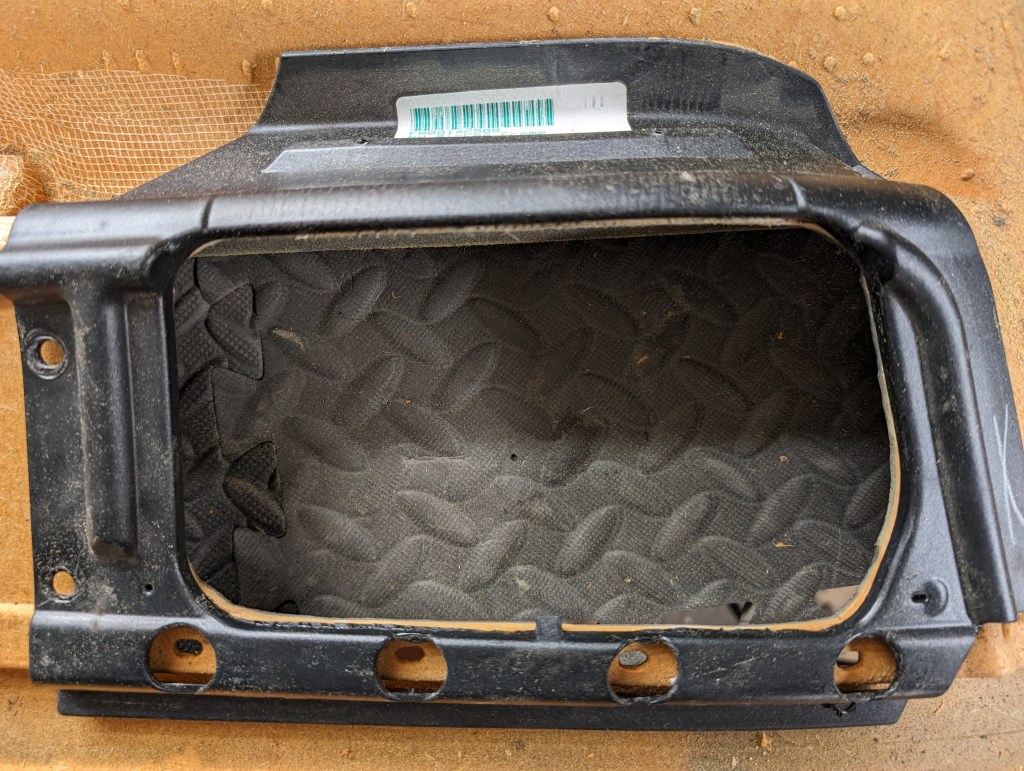


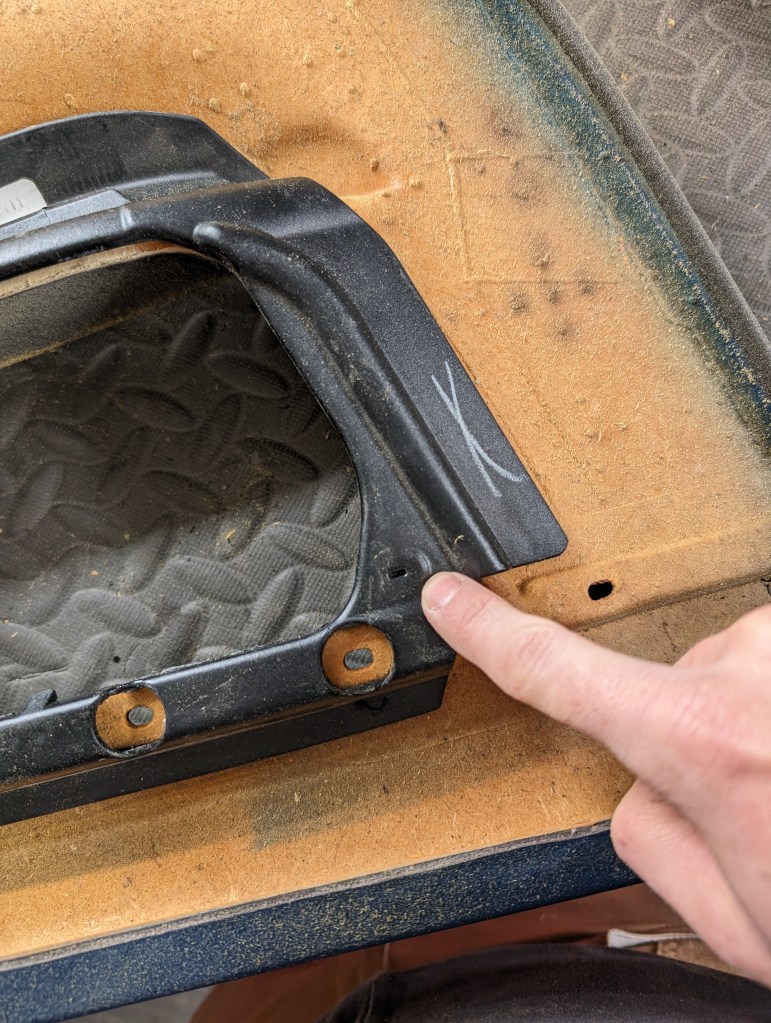


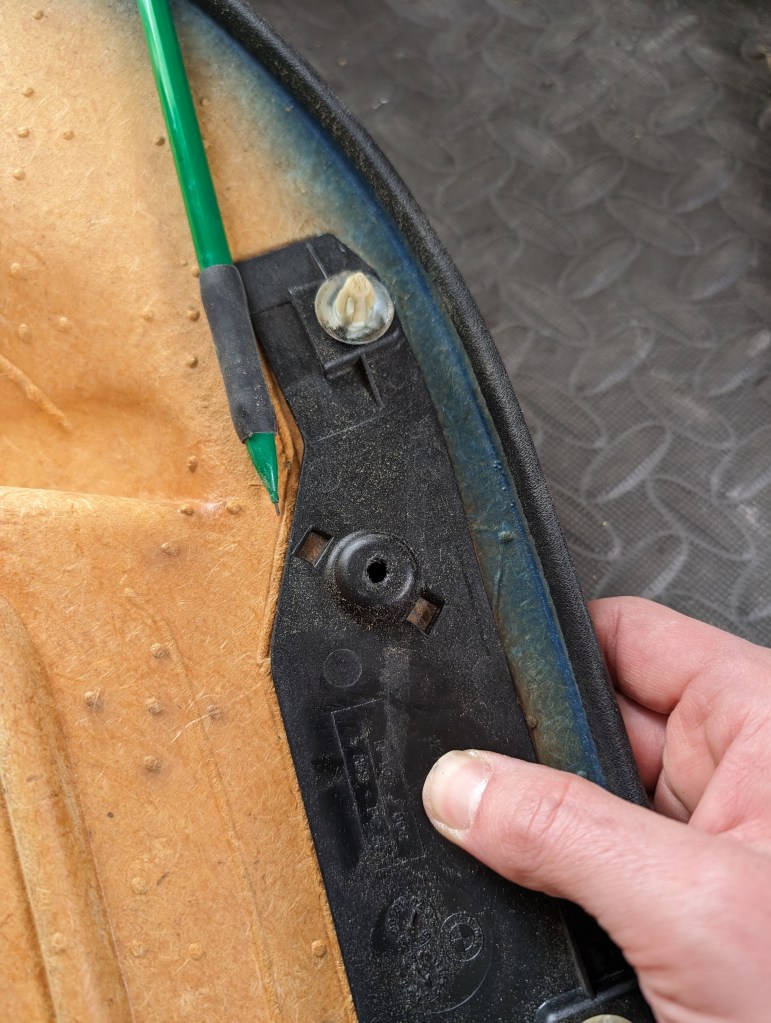
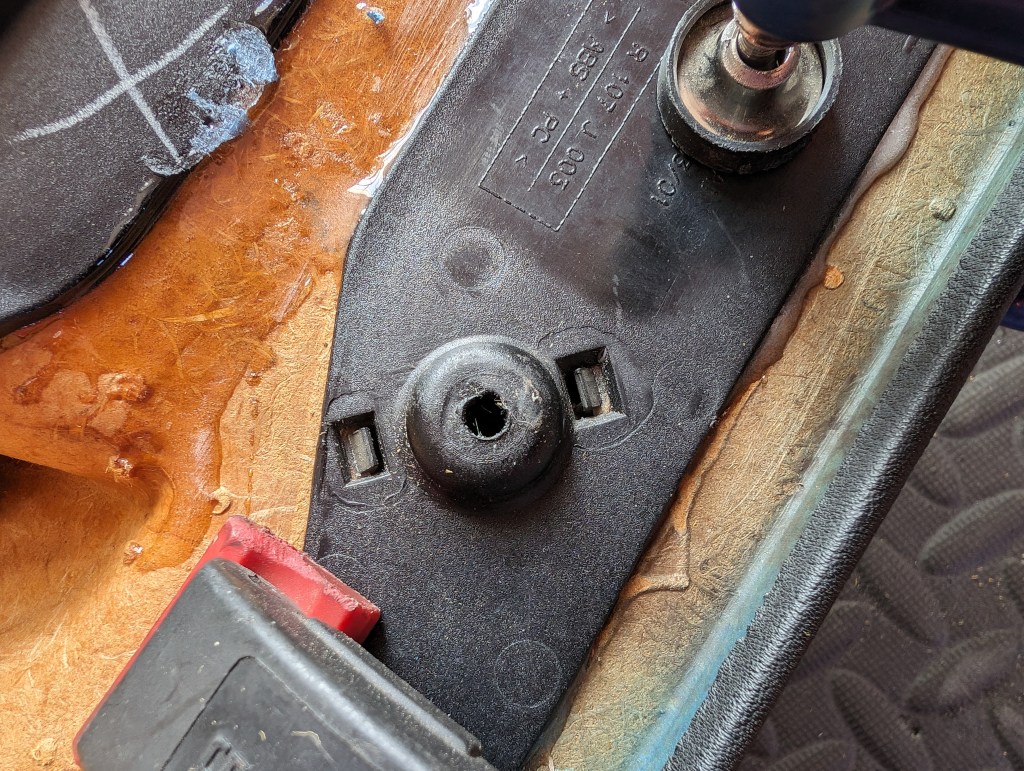
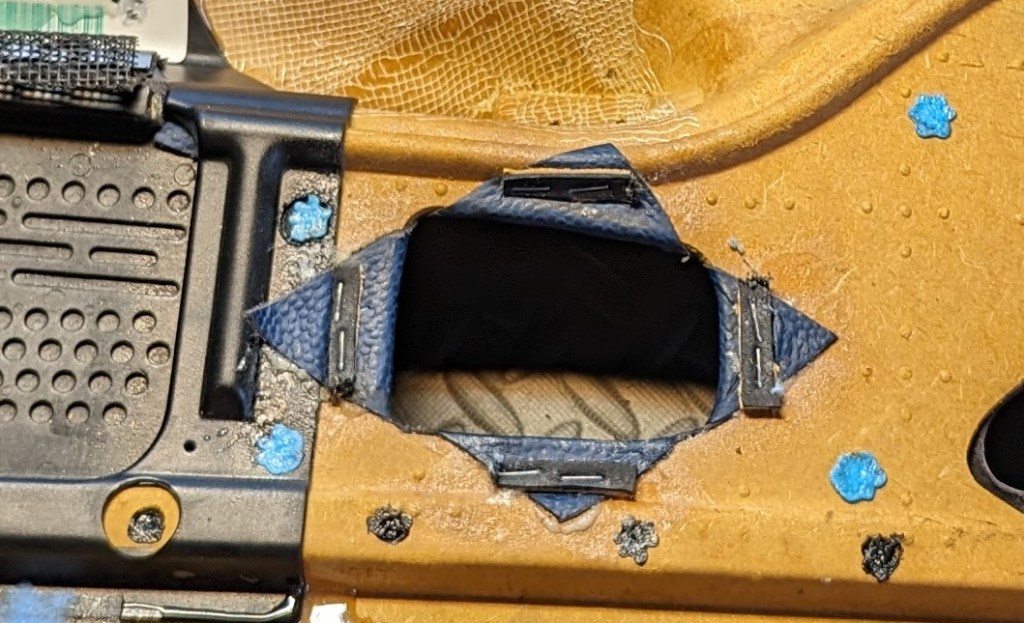
- The airbag panel clip/mount/anchor should be targeted using the mount itself and the two tab holes. NOTE: The airbag tab clips to the door card itself so do not open up the sides of this hole to the edges of the plastic mount. Make a transfer stencil using your existing airbag card and mark it accordingly. The airbag tab clips are asymmetrical so ensure the “longer” leg of your stencil is pointing down and forward when transferring. Cut out the hole and legs for the airbag retraining screw access/cover to fit snuggly into the door card. TEST FIT FREQUENTLY.


- Door card: Any location that will need to have something adhered with the epoxy, hit with 80grit sand paper to scuff the surface to promote adhesion.
Reassembly:
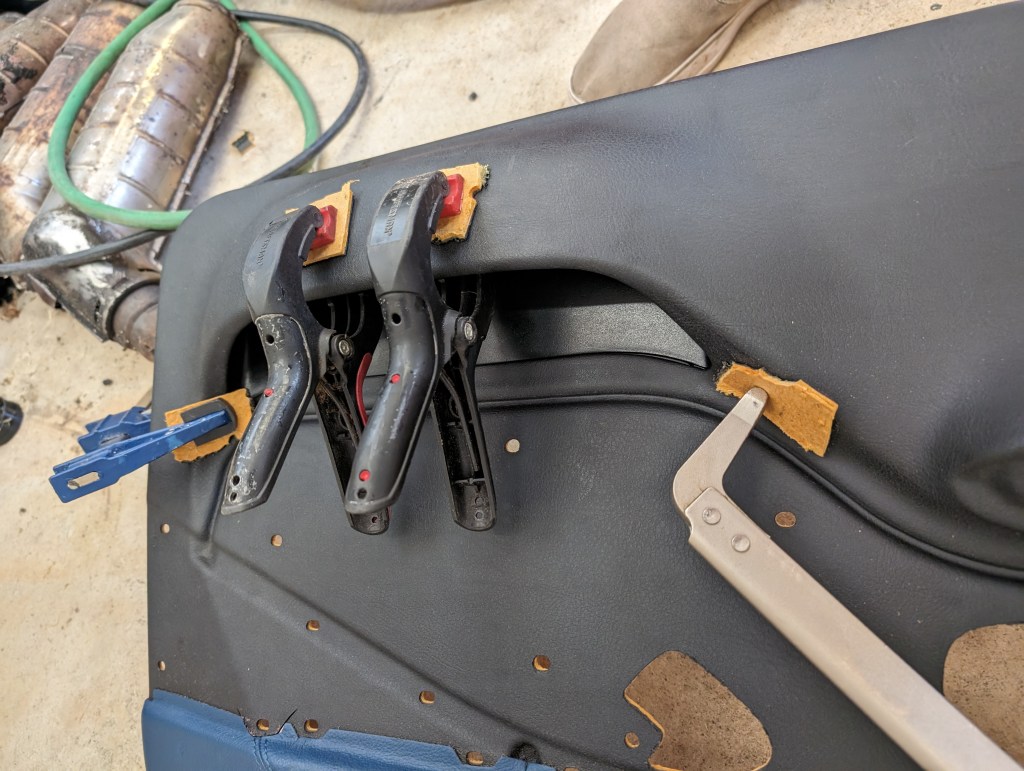
- Non-Extended leather vinyl shrinkage over the speaker hump: Chances are with any non-extended leather door card the vinyl has UV damage and has shrunk and caused loose/wrinkling over the speaker pods. My previous door cards when I replaced the inserts I also reattached this material to have it smooth again. Removal of the Window Trim plastics is required (steps 3 & 4). With the speaker assembly and the window trim removed, stretch the vinyl and ensure it will wrap around the door card edges. Light applications of heat and/or vinyl treatment products can assist in this. HEAT should be used sparingly. Scuff up with the 80 grit paper as best as possible the two mating surfaces without separating them any more. Vacuum/clean to maximum extent practical afterwards and wipe clean with alcohol. If you have a spray can of 3M adhesive, in disposable cup spray a suitable amount of adhesive (if you have a bulk can of adhesive just use the can) and using the acid brush apply the adhesive from the cup onto the two mating surfaces. IMPORTANT: Keep the surfaces separated long enough to allow the adhesive to tack up before attempting to stretch the vinyl and readhere it. Once you believe the adhesive is tacked up, give it a few more minutes to be sure. With the adhesive tacked, stretch and wrap the vinyl around the door card and secure in place with clamps and allow to bond for a suitable amount of time (or per manufacturer’s instructions) [Photobucket media strikes again]
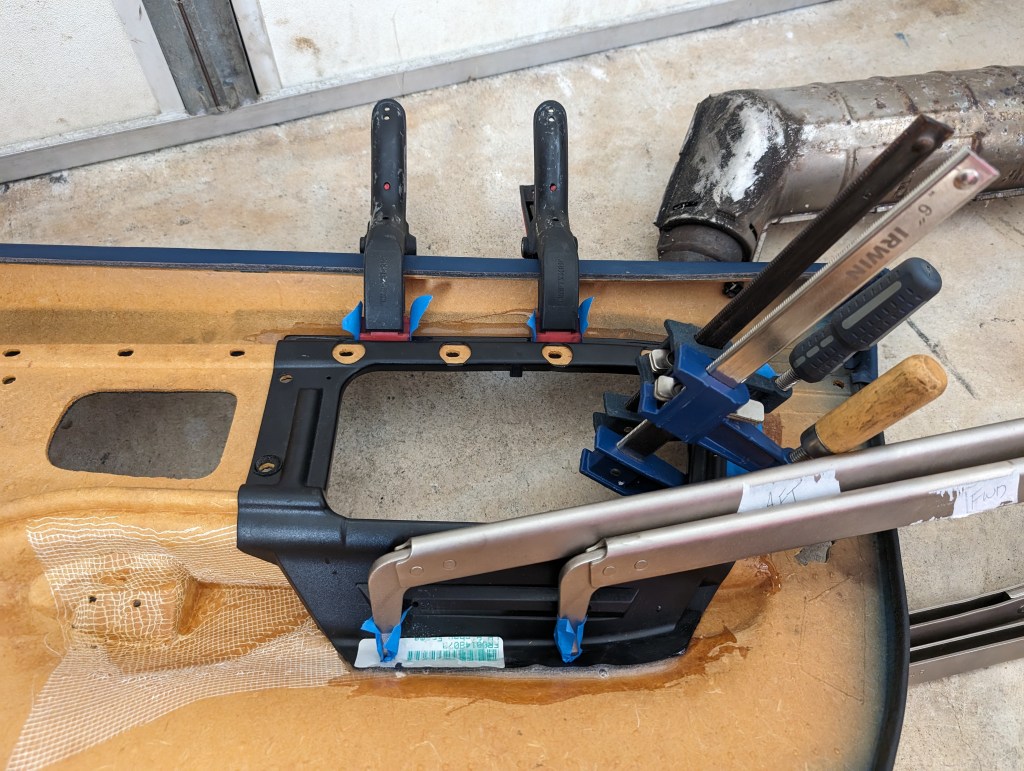
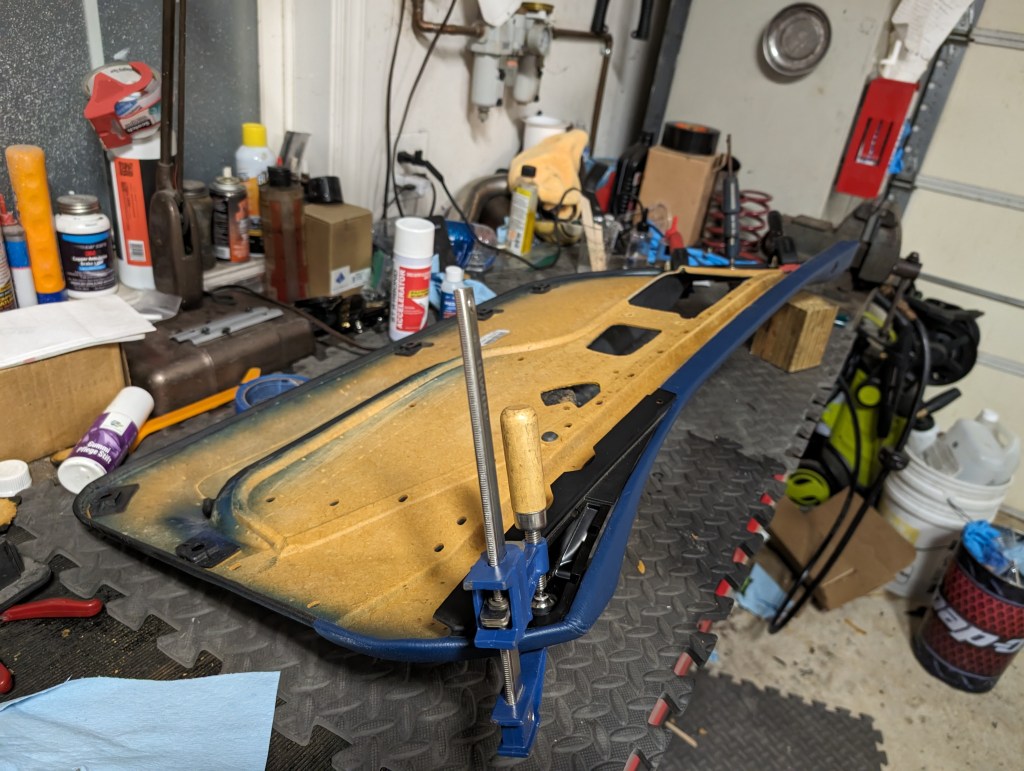
- Plastic part application: All the plastic parts (window trims, airbag mounts, panel clip mounts, door pockets, etc) are re-applied using the same process- mix epoxy, apply epoxy, clamp in place, allow it to cure, repeat for next piece. Any time a clamp is applied to the door card outer surface ensure to protect the surface by distributing the clamp load. I use parts of the airbag frame mount cut out door card in roughly 1.5”x 1.5” squares between all clamps and the door card exposed surface. Clamp forces should be only be as tight as necessary to remain in place when curing. Overloading the clamps can leave dimples/defects in the exposed surface. Small defects/dimples can be smoothed via smooth seam roller. For the window trim plastic, ensure the screw on the cabin side of the door card is in place prior to clamping into final position.


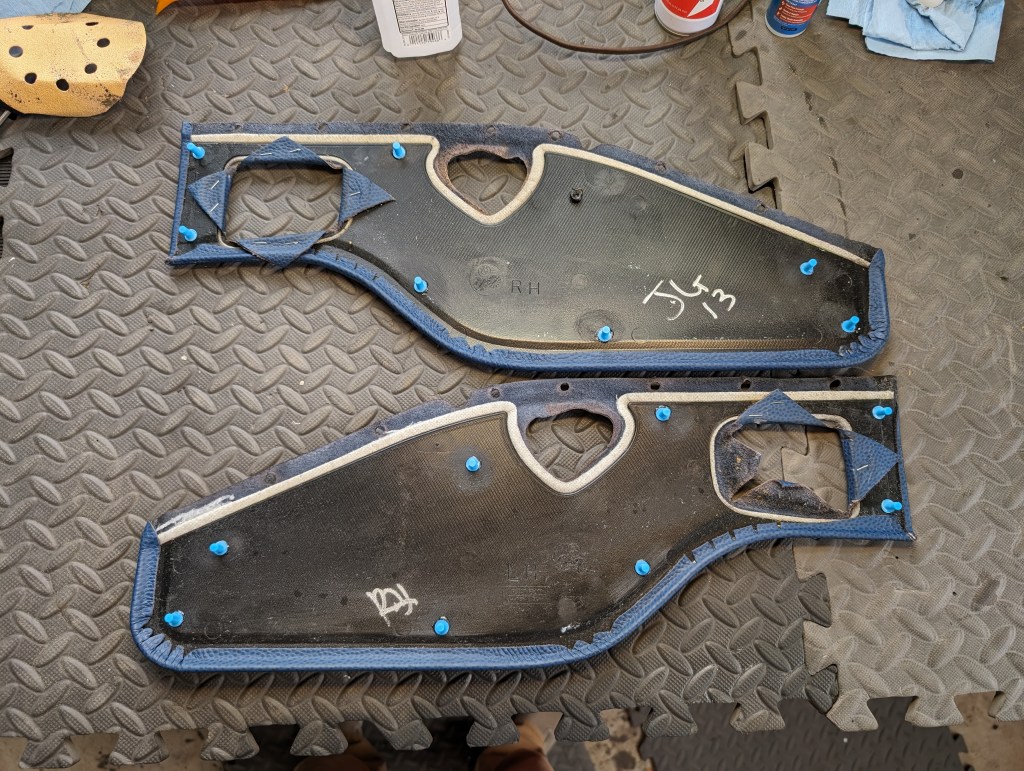
- Door card inserts: Must be installed prior to the hockey sticks.
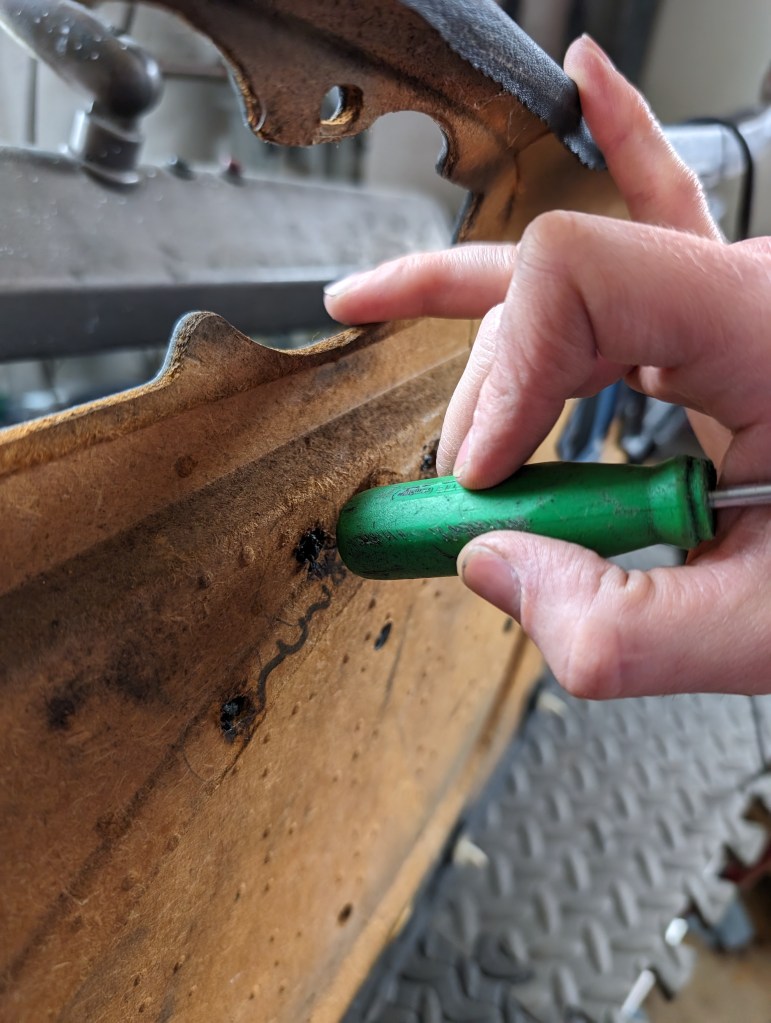
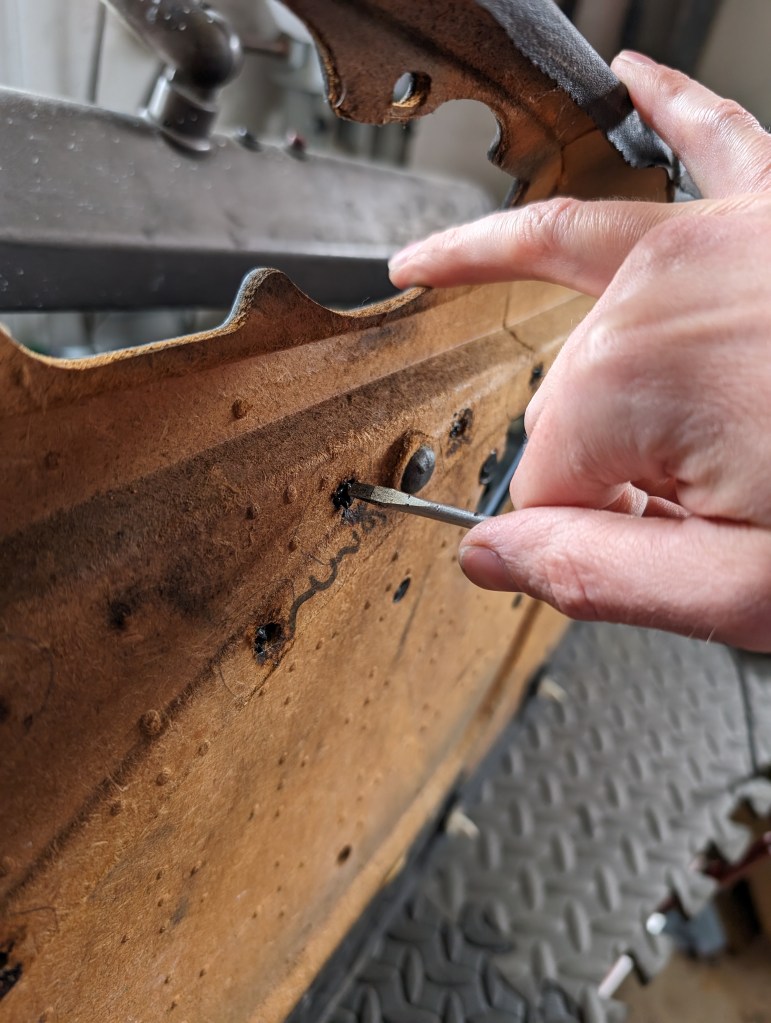
CAUTION: I use a half face respirator when melting the plastics parts, please use PPE during the plastic melting
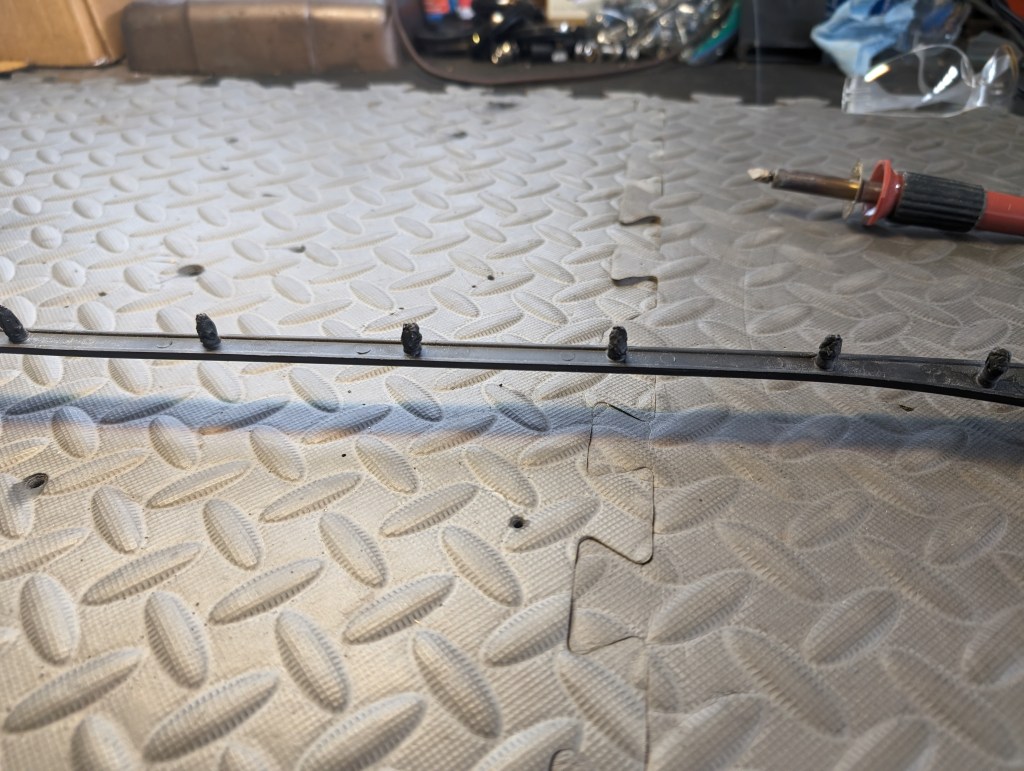
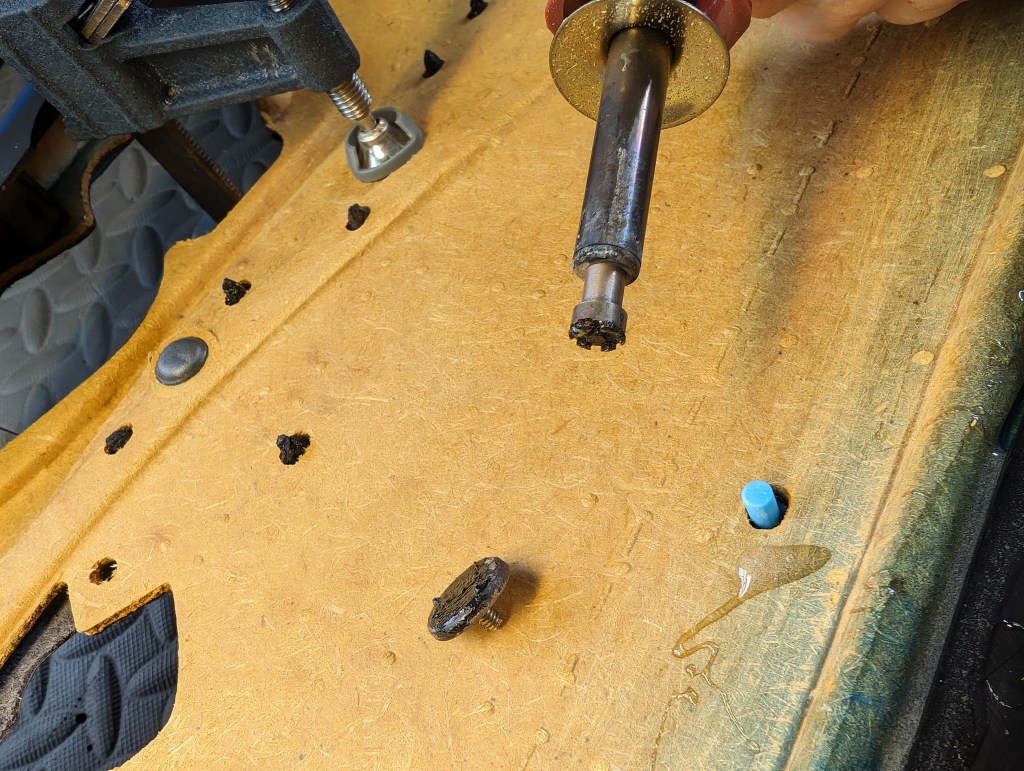
Install your applicable inserts and using the flat channeled tip (pictured below) melt the studs down. After flaring, I press from the insert side with one hand and press down with the broad flat tip in my fingers until the plastic is cooled in place to ensure the stud is making the panel up tight. Repeat for all the insert studs. For airbag break away inserts, snap them into place and attach them to the airbag frame mount. Ensure the mesh is captured between the frame and the retention bar and install the two screws.

- The melt stud process in 18 is then repeated for the hockey sticks
CAUTION: I use a half face respirator when melting the plastics parts, please use PPE during the plastic melting - Once the hockey sticks are in place the insert leather should be attached to the back side of the door card. BMW originally did this with 1/8 inch height staples which I am unable to source. 1/4 inch light duty staples are readily available. While I believe there’s no issue to use the 1/4″ in lieu of the 1/8″ directly I felt more comfortable with a spacer piece between the staple and the materials to ensure there was no unwanted penetration through the door card parts. I used more of the door card material cut out for the airbags but cardboard or even rolling the leather edges under themselves to add thickness would suffice. Apply the fabric adhesive to both surfaces and allow to tack up, press firmly together and send the staples.

- Door pull: The pull should slide back into place and be attached at the bottom with the backing plate and two screws. If your melt stud was recovered, repeat the process from 18 to reattach it. If you had to replace it with the M7 stud, install the washer and nut to secure the top part.
- Speaker pod: The pod slides AFT and is screwed into place, ensure the pod is fully seated before installing the screw.
Congrats, the door card is done, now go do it all again on the other side.


Leave a comment