For BMW M/S5x boost applications when using one of the stock manifolds, the Positive Crankcase Ventilation (PCV) system needs to be addressed thanks to the manifold now seeing boost pressure. The ESTS however could use, more or less, the stock PCV system with the original oil cyclone separator and all its standard parts if I was so inclined. There’s some pros and cons of the original system, and for me it was more con than pro so I decided to tackle an entire revamp of the PCV system when I installed my ESTS.
If you’re just here for a parts list and a system diagram just hop to the bottom of the page.
The basic PCV system works with a port tied into the crankcase space, typically at the valve cover, that is attached to a vacuum source, typically the intake manifold. In basic systems there is a PCV Valve in the line connecting the two to control the amount of vacuum applied to the crankcase to not pull too much oil vapor out and cause consumption issues and can act as a check valve in the event of a backfire to not positively pressurize the crankcase. This effort is made to evacuate any blowby combustion gasses that can build pressure in the crankcase and cause oil seal leakage, break down oil more quickly, and can affect efficiency (via drag) of the rotating crank assembly. Summit Racing as a nice help article and proves the photo below showing how they work.

BMW took it one step further on these motors and installed a diaphragm controlled cyclone separator in lieu of a simple PCV Valve in the system to separate oil vapor from the air and return oil to the oil pan in an attempt to limit oil vapor ladened air being introduced back into the intake track.

I had two major concerns when making my decision to not reinstall the BMW system with my ESTS. First, no matter how well the cyclone separator is working, I’ve never seen a M52/S52 intake track that didn’t have some amount of oil in it that had passed the cyclone separator. These oil particles are mixed into the intake air and enter the combination chamber ultimately lowering the octane rating of the combustion mixture, however negligible. Secondly, the diaphragm of the oil separator will eventually fail. With the separator being buried beneath the ESTS, and the scarcity of good intake manifold gaskets for the charger, and the complete bear of interference removal and reinstall to replace it was not appealing to keep the system in place. There’s further speculation that the combustion chamber blow-by contamination being separated by the cyclone effect being dumped back into the oil pan isn’t ideal, but I never saw issues in my oil analysis for combustion products in the oil.
To accomplish removal of the original system I had decided to install a baffled oil catch can to again attempt to limit oil vapor mixing with the intake air. The oil separator is normally installed on the upstream side of the compressor (the vacuum source) with a rubber grommet to seal the port and three bolts to hold it in place. Initially I installed an extra -10AN male fitting that was snug in the grommet when the TS was on the workbench to tap into my vacuum source. It was later identified that once the 180° -10AN fitting and hose that the fitting did NOT stay in place amd would be a huge vacuum leak risk which is one of the main reasons to changing the system.
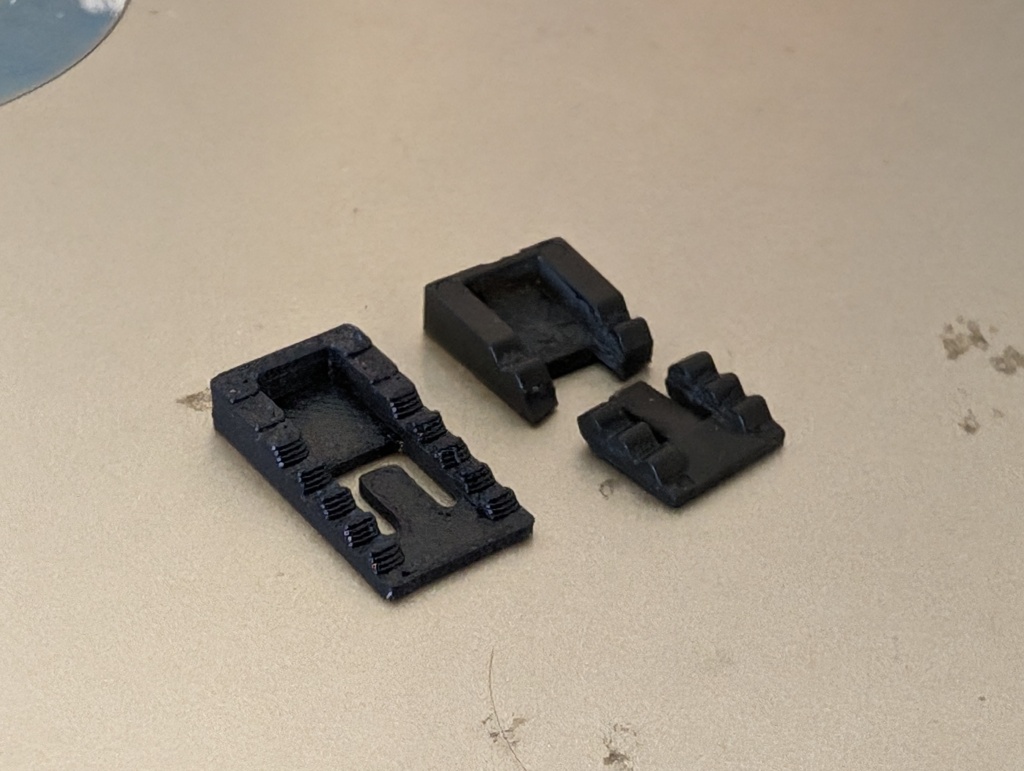
The solution? Might as well make a one-off adapter fitting to mimic the oil separator mounting to allow installation of a true -10AN ORB fitting. It turns out that the manifold port is sized to accept a 024 size o-ring boss nearly perfectly. A few 3D prints later to dial in the location of the mounting bosses to the port boss and the plastic test parts turned into a single piece aluminum adapter from my local machine shop (R&L Machine, Chesapeake, VA). They exceeded all expectations on fit and finish. I am a little sad that unless reading this article the part can never be admired.


To attach to the crankcase port, luckily, Radium Engineering has designed a plug and play -10AN fitting (PN: 20-0758) adapter that secures directly to the factory port. Additionally, Radium Engineering also has available a -10AN PCV Valve (PN: 20-0561) that is required to manage vacuum levels in the catch can. For unknown reasons they made the manifold side of that valve a -6AN which I had zero fittings or hose for. For my own work around due to materials on hand I also picked up a -6AN/-10An adapter to upsize it back to -10AN to keep my hose size consistent and match the PCV manifold adapter that I already had in hand before I had identified which PCV valve I was going to use.

Note: The RE adapter comes with a green anodized locking collar, as it was the only bit in that color I ended up scuffing it up and painting it black as it stood out like a sore thumb.
A little off-topic for general PCV system but also incorporated into my redesign and use of Radium parts, the ESTS nose cone vent originally tied into the intake elbow and similar to the PCV with engine oil could introduce minor oil vapor laden air into the intake track from the nose cone. To alleviate this concern, I used more parts from Radium Engineering. This time an inline fitting (PN 14-0148-10) to provide a ⅛ NPT port for installation of a barbed elbow to be installed and the hose routed to from the nose cone.

I scoured oil catch cans for more weeks than I like to admit, but finally settled on the ECS 8oz baffled offering. It checked the boxes of size, price, port style, physical port design/locations, had the option to reverse port orientation, and had the nifty integrated dipstick. It also had the option for the universal mounts that integrated seamlessly with the can to make mounting pretty simple.
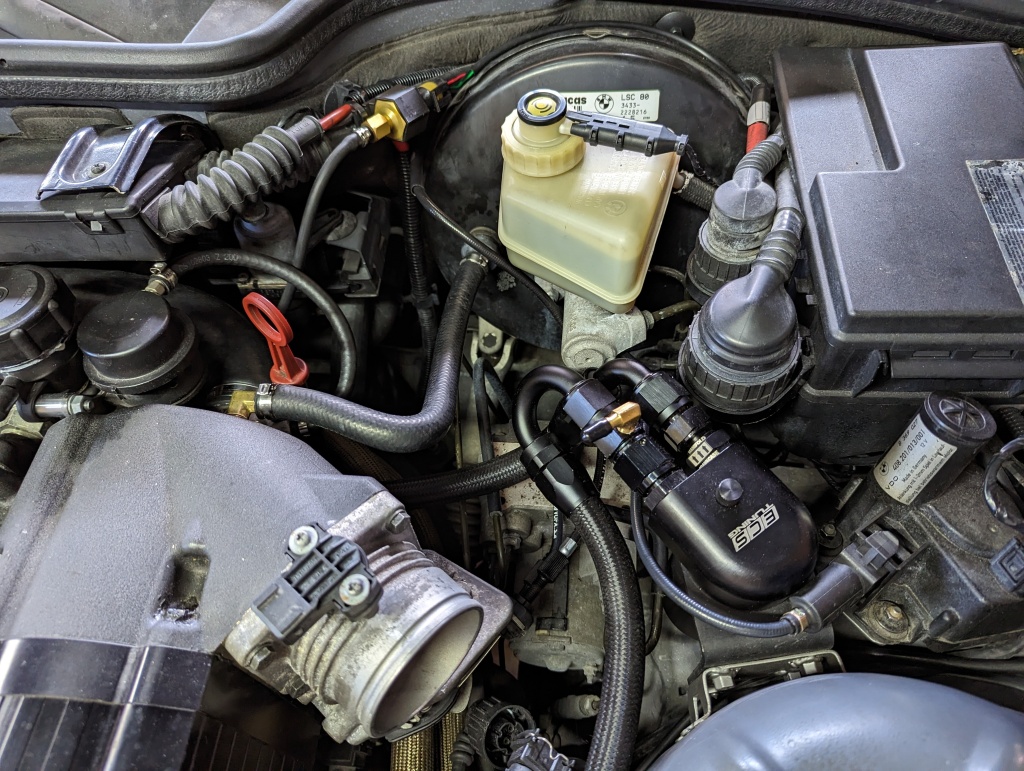
With all the parts acquired, all you gotta do is put them all together. My new adapter is mounted to the ESTS with a -10AN ORB male fitting, a short run of vibrant hose with a 180° fitting at the ESTS and a 90° to the PCV Valve with adapter at the catch can. The other side of the catch can has the port adapter to 180° fitting that heads to the PCV port on the valve cover terminated with a straight fitting to the RE port adapter.
Oh I forgot to mention the mounting of the catch can. Since I was deleting the ACS throttle body with the ESTS, I also decided to remove the actuator that controlled it as it was useless which left a handy spot that was out of the way and close to where everything needed to be routed anyway. A little bracket making and welding later it was in place. I have the steel-it paint a shot as it’s boasted to be able to weld through, and had a steel gray color. While not a perfect match, with everything in place, it’s good enough for the time being.


With the mount in place the one brake line required a little flexing to clear but as you can see the clearances are tight to everything around it but it does not touch.


Note: that last photo has the ports swapped from final orientation as I hadn’t figured out the final routing when it was taken
So how well does it work?
Well, to be honest, I likely took some bad advice from undisclosed sources to just add a bit of extra oil above the “full” mark to help concerns of oil starvation concerns with an unbaffled S52. After the two days of mountain runs at Schuh 2023 I ended up showing the system to someone asking about it and the catch can dipstick showed FULL of oil. I pulled out a full 8 oz of oil in two days and my oil pan dipstick still showed full. This tells me two things, the system is working and likely I was putting my original oil separator to work before I had switched the system. I disposed of the captured oil, and the following day’s drives I have had little to no oil fill the catch can again.
Materials:
Radium Engineering PCV adapter PN 20-0758
Vibrant -10AN straight hose fitting
Vibrant -10AN hose
Vibrant -10AN 180° hose fitting (2 each)
Radium Engineering 1/8npt adapter fitting PN 14-0148-10
Barbed elbow (3/16 ID hose for nose cone connection, if required)
Vibrant -10AN ORB port adapter (2 each)
ECS 8oz catch can
Catch can universal mount kit
Misc steel for weld on mount
Radium Engineering PCV valve PN 20-0561
-6AN female flare to -10AN male flare adapter
Vibrant 90° hose fitting
PCV adapter plate (DBG design)
024 Buna-N o-ring
Steel-it paint
Special Tooling:
Vibrant AN fitting bench vice adapters
Vibrant hose shears
Adjustable AN wrench
Mishimoto fixed -10 wrench


Leave a comment