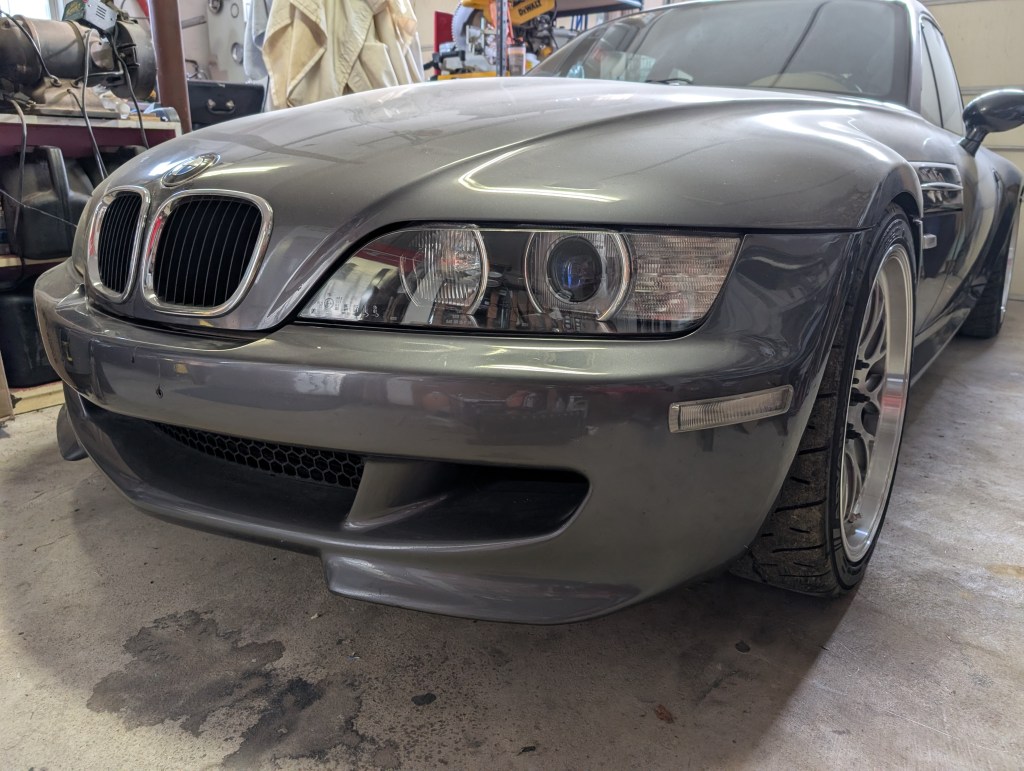
The long debate of the risk vs reward of the mechanic fan on M52/S52 chassis E36 era cars has been a strong dividing line since the cars have been in existence. Regardless if you are team “no mechanical fan” or “must have mechanical fan” we can all agree that a properly installed electric puller fan can be the best of both worlds.
–
I am quite adamantly team “no mechanical fan”. I previously had a E36 328i with the M52B28 motor and had gone mech fanless on it and similarly the Mcoupe’s , likely within the first 2-3 weeks of ownership, fan met my trash can. In hot and humid Virginia summers sitting in traffic, with AC blasting, I’ve never had any issue. But that debate is for another post if we really want to get into it.
–
This post is for the installation of a electric SPAL puller fan/shroud kit from Zionsville.
–
A little background first, feel free to skip ahead if you’re just looking for instructions on how I installed and wired up my SPAL puller fan. As discussed, I had long since been without a puller fan. The stock 2 speed pusher fan with a lower temp fan switch in the radiator for some peace of mind has been working for me for the last 8 years or so since I did my whole coolant system overhaul. But with the ESTS install this past off season the air-to-water heat exchanger now needing to reside in the same physical space as the pusher fan made me revisit my cooling fan situation and reinstall a puller fan. When I went down the coolant system overhaul rabbit hole I ended up purchasing a Zionsville Type 2 radiator (Z3M S52, no oil cooler provision). In subsequent years I had added an and S54 oil filter housing and bespoke Zionsville oil cooler to fill the gap between my type 2 radiator and the Motion Motorsports aluminum underpanel. The oil cooler required a bit of fitting to the bottom of the type 2 radiator since it was never meant to hold a cooler, which in turn meant that Zionville original shrouds were not quite a direct fit. To add to the complication I also had converted to the Euro S50B32 coolant expansion tank, so my coolant plumbing is completely different from the standard S52 coolant system.
–
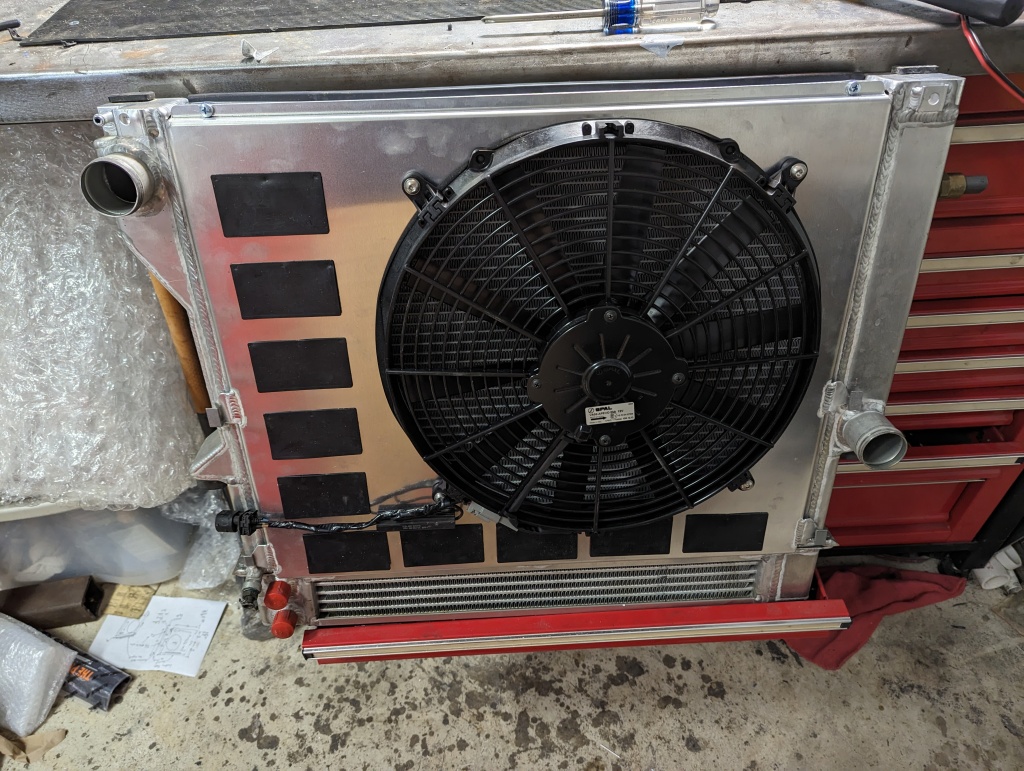
Enter my Zionville shroud with fan and wiring kit. It is outfitted for a 14” SPAL straight blade puller fan, speed flaps and offset to the passenger side to make as much space for the ESTS pulley and upper radiator hose. When I had originally placed my order, I had called Dwight at Zionsville to understand the “wiring options” they offered. He convinced me the kit he packaged was required to wire up the puller fan for 2 speed operation and that it was going to meet my needs. So that is what I ordered, one custom shroud, one 14” puller fan, one Aux delete II wiring kit.
–
Upon receiving the parts, the wiring kit fell short in my opinion to my expectations as it was a pair of SPAL fan relay kits, a poorly wired 3-pole connector (X19022) to plug into the original fan plug and a loose resistor. When I received the parts I was expecting a pre-made harness that was plug and play. I don’t even recall if the wiring kit came with the respective plug to plug into the fan itself but that may have been in the SPAL kits. As I dug into the OE wiring for the pusher fan to try and make heads or tails of what I needed to fabricate with the parts in my hands it became apparent that the car originally has a pair of relays to operation the low and high speed fan operation, further the OE wiring had the similar resistor in-line for the low speed operation. To my luck, I had just finished parting out a wrecked 99Mroady and stole the plug and resistor out of its pusher fan that was destroyed by the accident to cannibalize in my own wiring harness. Regardless, Zionsville was more than willing to accept my return of the wiring kit.

Getting back on topic for getting the fan installed and wired correctly, I used the cannibalized parts and my Deutch connector kit to fabricate a small harness to plug directly into the original pusher fan circuits to operate just the same, but on the other side of the cooling stack. This ensured the fan still operated when the AC was kicked on, regardless of coolant temp and would trigger with my lower temp coolant temp sensor in both high and low speed settings.
–
Material:
Deutsch connectors (multipack) (2pin only pack)
0.5ohm-85W resistor (cannibalized)
Heat shrink (optional) 1/8, 1/4, 3/8
3-pole connector (cannibalized)
M3 & M5 bolts
–
Tools:
Deutsch solid contact crimp pliers

I first had to mount the new shroud to the radiator. My shroud was a little unique in the fact that it only has the upper mounting flange and the 4 tabs to hold it onto the radiator. Traditionally the Zionsville shrouds have mourning flanges on both the upper and lower edges; however, due to my oil cooler fitment the lower flange normally mounts does not exist on my radiator. My upper flange mounting would work for a traditional shroud if the flange was in place.
When I ordered the oddball shroud I had the 4 tabs mounted a smidge low from the mount hooks on the end tanks to allow me to fit them in place for manufacturing tolerances during original assembly. Once the tabs were all tightly fitted and the mounting flanges between the shroud and radiator were aligned I could install hardware.

I choose to use rivnuts in the existing holes on the radiator flange and then template the rivnut location onto the shroud mounting flange using contact bluing. After the blue was transferred this allowed me to center punch and drill the hole for the bolt to hold the shroud to the radiator. Care should be taken any time when using bluing as the stuff loves to get everywhere even more so than anti-seize.

Once the bolted up the wiring was done. I unfortunately didn’t document the in process part of this installation but it duplicates the same wiring schematic as the original pusher fan. I confirmed the SPAL wiring polarity to ensure the fan was sucking as it should when energized and then cut off the original SPAL connector. I pulled out my Deutsch connector kit and grabbed the parts to make a 2-pole plug and my solid contact crimper. From memory the SPAL blue wire is 12V+ and the black is ground.
The fan harness consisted of the 3-pole cannibalized plug (X19022) from the Roady parts car, the cannibalized roady resistor, and a few solder joints that terminated in the harness side of the 2-pole Deutsch plug. The 3-wire existing pigtail wiring was re-used for this harness.
–
3-pole plug wiring is as follows:
Pin 1: BR[brown], ground
Pin 2: 2.5 SW[white]/BL[black], normal speed operation
Pin 3: 4 BL [black], high speed operation

I connected the BL (pin 3) directly from the 3-pole to the 2-pole 12V+ pin. I then connected SW/BL (pin 2) to one side of the resistor. The resistor output wire was then t-connected into the BL wiring previously made up. Finally, I connected the BR (pin 1) directly to 2-pole ground pin.

The resistor had two small mounting hole, these were original screws mounting into the plastic pusher fan housing a smidge undersized for an M3 bolt. As I wanted to use the rivnuts in lieu of a sheet metal screw for longevity and less risk of stripping, I drilled out the resistor mount feet and then templated onto the shroud for new rivnuts and installed. This allows me to remove the fan from the shroud and the shroud from the car with both plugs on either end as needed.

Now for most with a driverside bias fan this is likely less of an issue, but with my fan location on the shroud I had a very tight clearance to the threaded mount for the removed mechanical fan clutch on the water pump. I decided to remove the mounting point as its not necessary for my application to gain some clearance and comfort. This was accomplished with a simple R&R of the waterpump with some dremel work and a scotchbrite pad.
–
Before trimming:

During:

After trimming:


Leave a comment